From persona to production: Exploring AI-based branding through virtual avatars. Can I build a consistent digital brand presence with AI-generated identity? Watch me dive into the technical and creative challenges of creating a virtual brand persona.
Live case study: ongoing experiment
Personal note•Drafting in public
Influencingfrom behind an API
Live Experiment
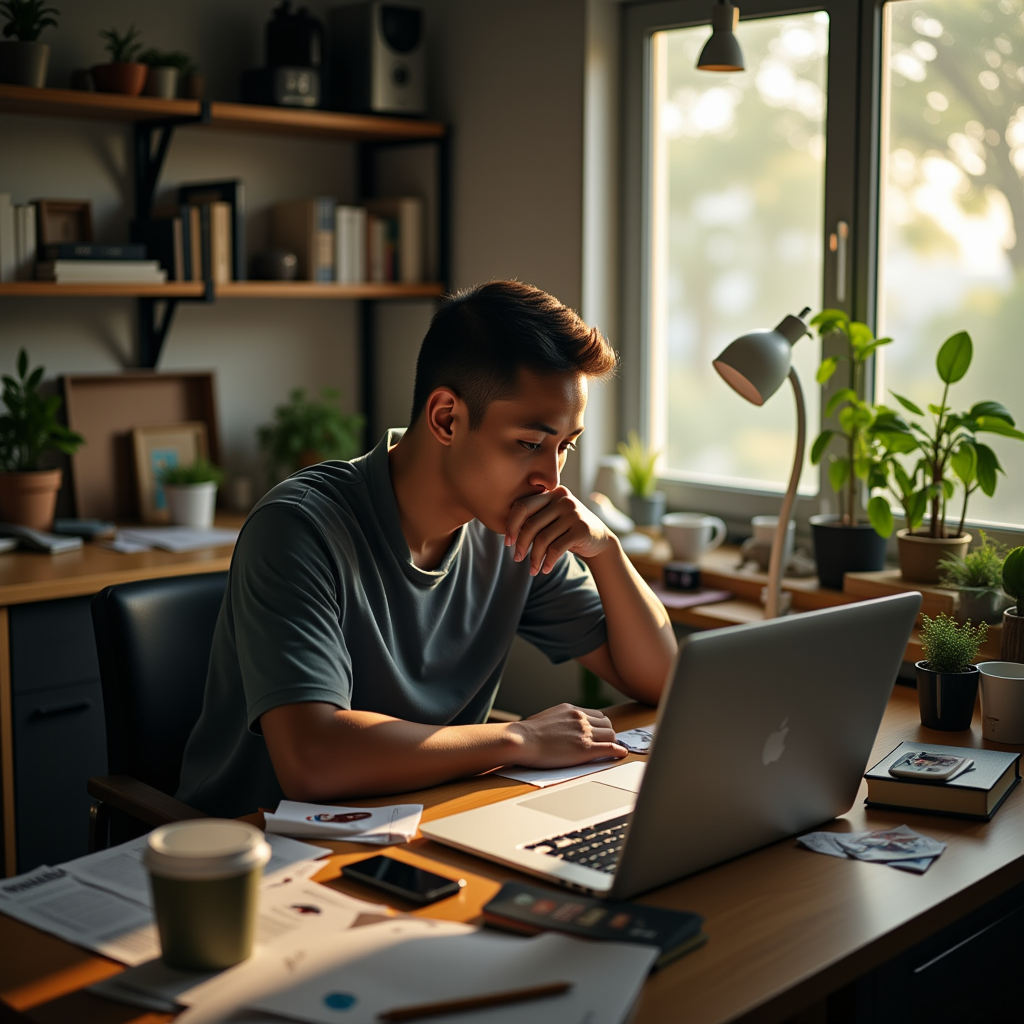
I never wanted the spotlight - just the signal. Can I create a digital version of myself that lives online without performing in front of a camera every day? The tech for AI influencers is already here, and some creators are pulling off amazing (and believable!) content with Sora 2, Veo 3, etc. I want to stay on top of this. The gap isn't technical anymore; it's about coherence, persistence, and storytelling.
This is me testing it live. No tutorials, no production team. Just experiments, breakdowns, and trade-offs behind building a synthetic version of myself that could influence - from behind an API.
1 follower
•0 posts
•4 posts scheduled for November
Working project name - subject to change
Narratives
Cinematic
Exploring AI-driven storytelling through character-driven narratives. Testing identity persistence across scenes, video generation, and cinematic composition.
Testing video chaining, cinematic composition, and character persistence
Active Steps
Step 17
Identity reenactment research
Step 18
Multi-angle dataset building
Local Generation Journey
•Fed up with paying $0.01/image on Replicate → switching to local RTX 3090
•Tried out ComfyUI for local image generation, hating it immediately
•Created a Claude Code prompt to fully automate ComfyUI - no longer need to open this ugly UI ever again. Thanks, Claude.
Latest Realization
OH NO!
I just discovered something I wish I hadn't, because it opens up another rabbit hole. While upscaling images with an open-source model, I was losing my own likeness. Then I realized: I can reference my own LoRA to achieve subject-agnostic upscaling, where likeness is not lost in the slightest.
And the results are amazing! Upscaling the scene very highly, with me still in it. I am super happy about that.
Enter: Scene Style LoRA Multiplexing
Theoretically, I can now train a separate LoRA model on the scene composition, lighting, color grading, camera angles, and shadow work that I absolutely like - the artwork around the character. Then generate images with edwin-avatar-v4 (for identity) while layering edwin-scene-style-v1 (for consistent aesthetic composition).
I hate this, because I just got around to the idea that I was done training models. And this means I need to train at least 2-3 versions to get it right. Which means renting more 8x H100s, spending more money and TIME! (3-4 days to get proficient at least). But I'm also done tweaking prompts for hours to retain scene style consistency—composition, lighting, depth, color palette—and even coming up with a 7-layer prompt architecture to control it all. Now I understand why most successful AI-influencer creators that I'm looking up to are still TEAMS, not solo creators (and of course, they are also making money with this). If only I could train an AI to help me with this! Hah, but this is not a rabbit hole I am willing to explore (for now).
Since it's no longer the weekend and I have other responsibilities, I'll slowly start building a nice dataset of styles. For example, for the Ziegler story, I have a very specific style in mind that is not easy to replicate and has not yet been done (so it's a little hard to draw from). Let's take a break—I'll come back here in due time.
Review Session
Key Question:
Can I get better AI content from my own workflow at a better opportunity cost & value ($) vs third-party providers? (Learning now, but need speed eventually)
☐Review Higgsfield AI
☐Review Kling AI
Project Overview
My Approach
This experiment is about finding my way as an AI engineer to train my own models. I'm using LoRA fine-tuning on Flux, training on 84 photos of myself so the model learns my specific features - not a generic face. Then layering on scene casting, face-swapping pipelines, multi-angle character generation, and video workflows that chain keyframes together.
Everything runs through custom-written scripts and automation: image generation, dataset preparation, video pipelines, face swapping. Every step - from LoRA training to scene casting with Nano Banana - is versioned and cost-tracked. The goal is character persistence across scenarios: a digital version consistent enough to build a brand around.
Behind the scenes, all prompts follow a universal 7-layer architecture (LPA) that achieves 90-100% facial likeness by separating identity, environment, lighting, and camera controls into non-interfering layers. This prevents common AI artifacts like miniature effects, phantom shadows, and synthetic polish.
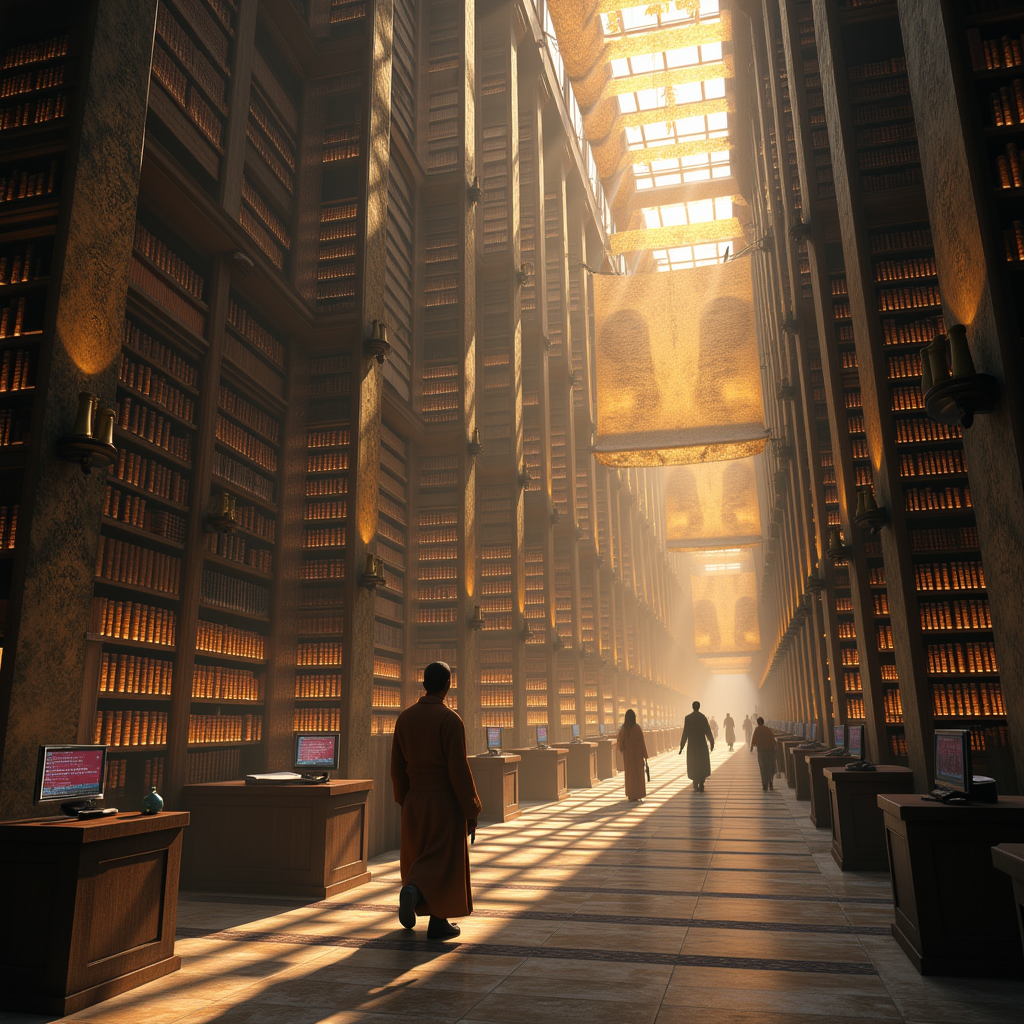
Ongoing research • Custom LoRA model trained on 84 images • Click to view gallery
In Progress
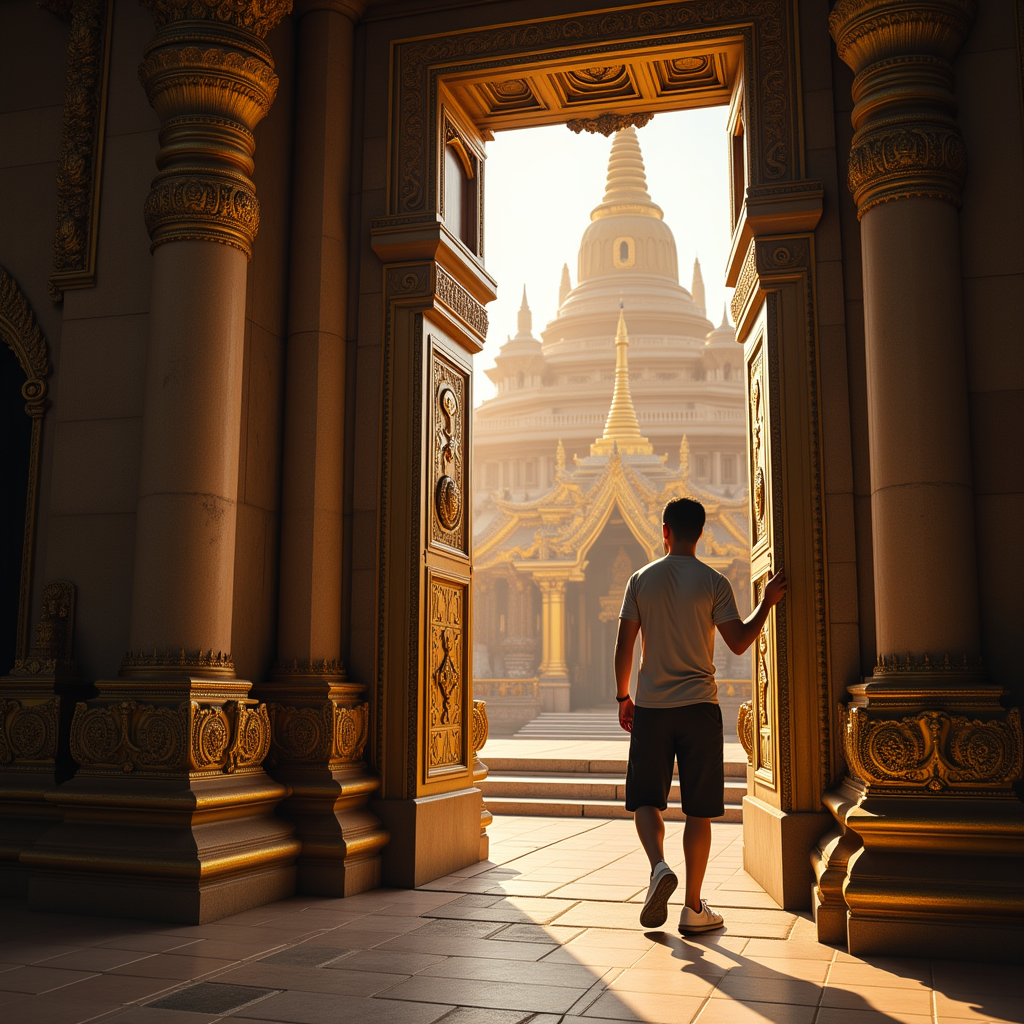
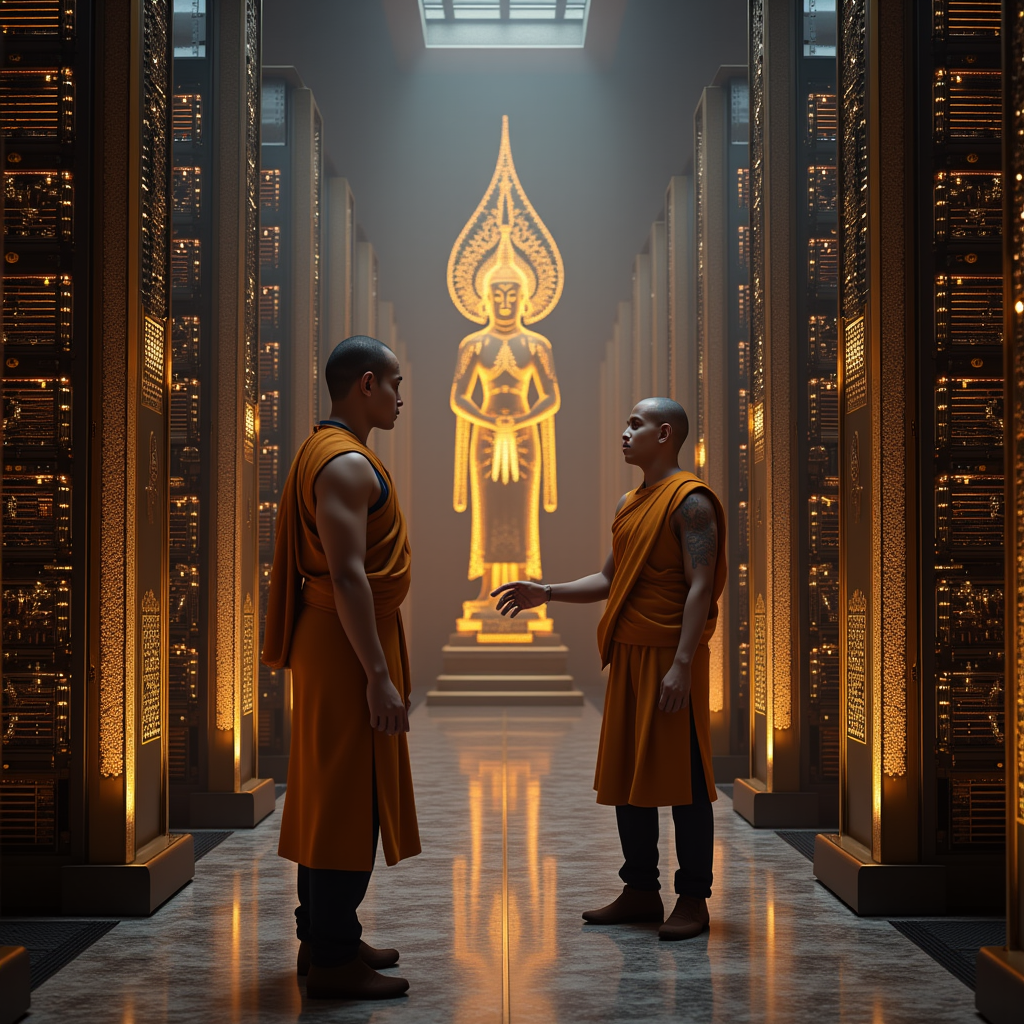
Click to view full gallery of 12 images + videos
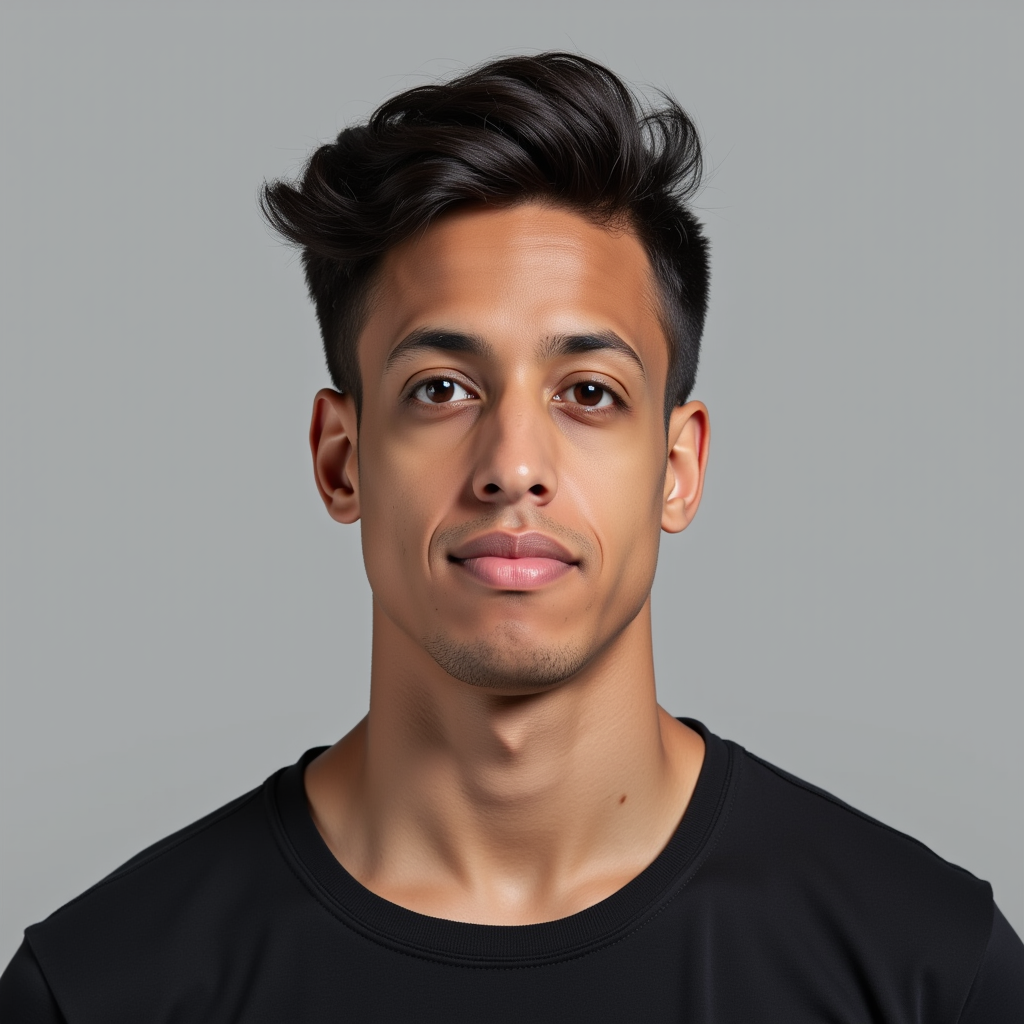
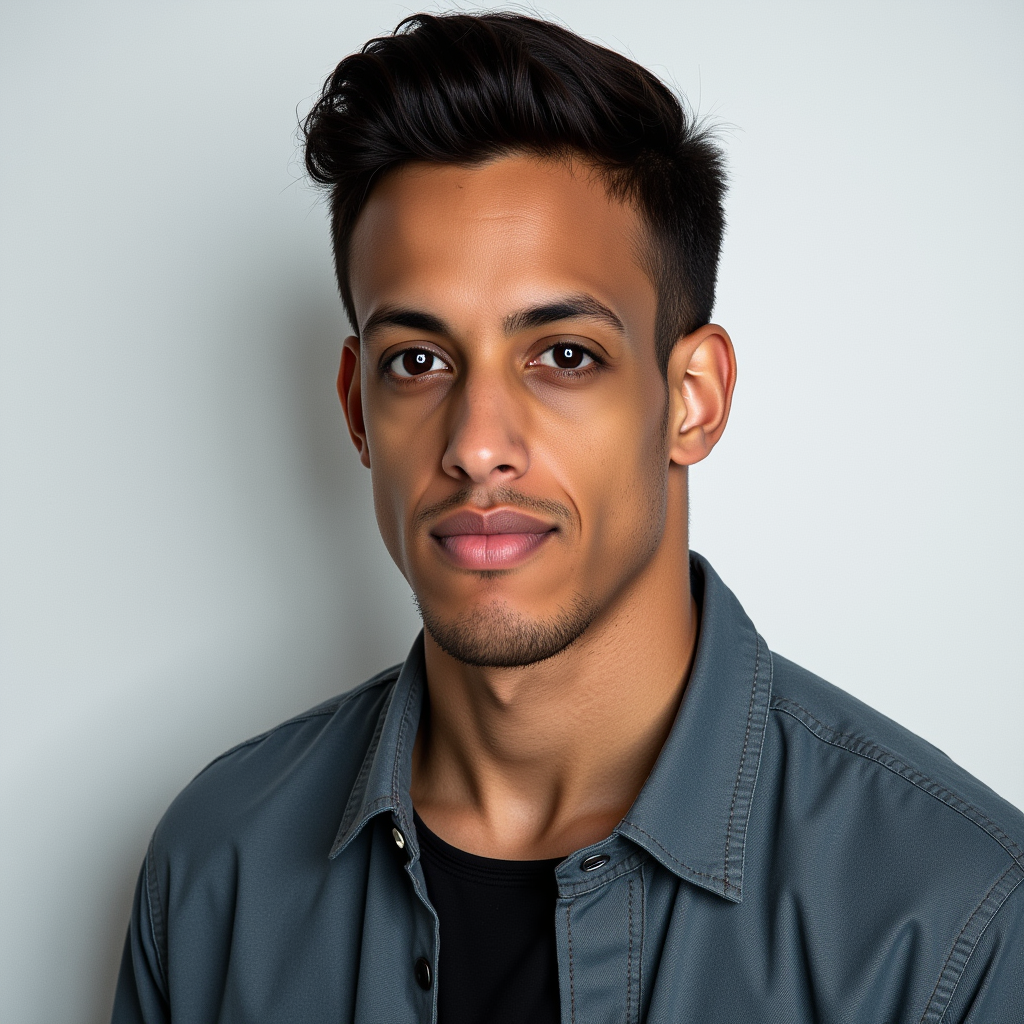
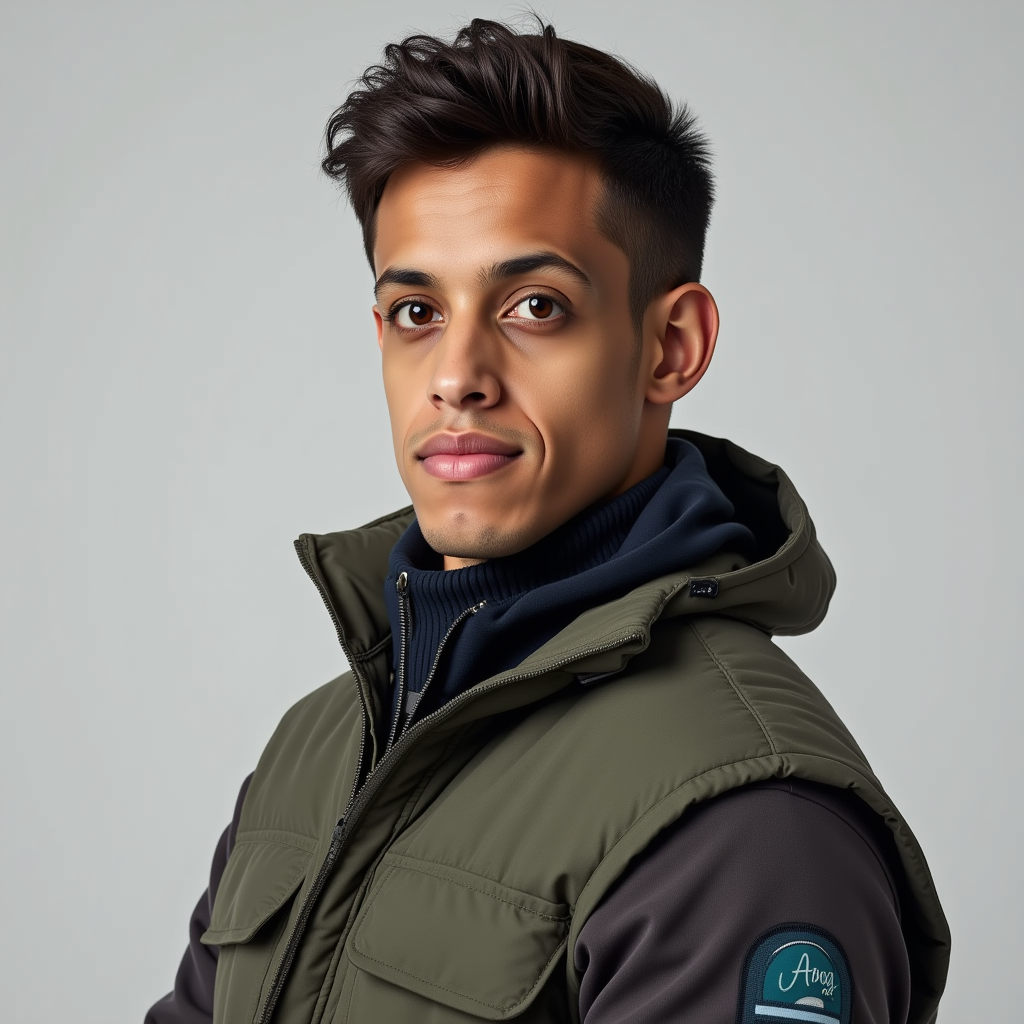
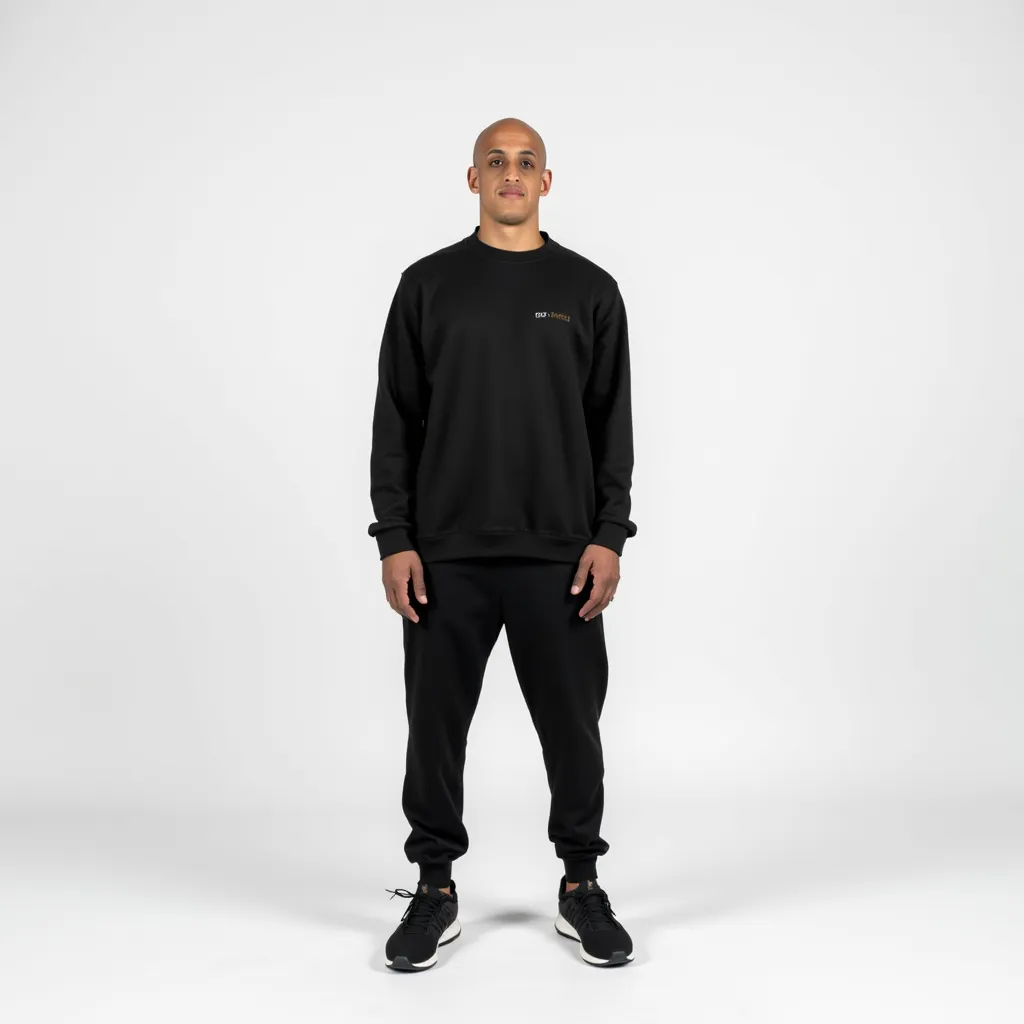
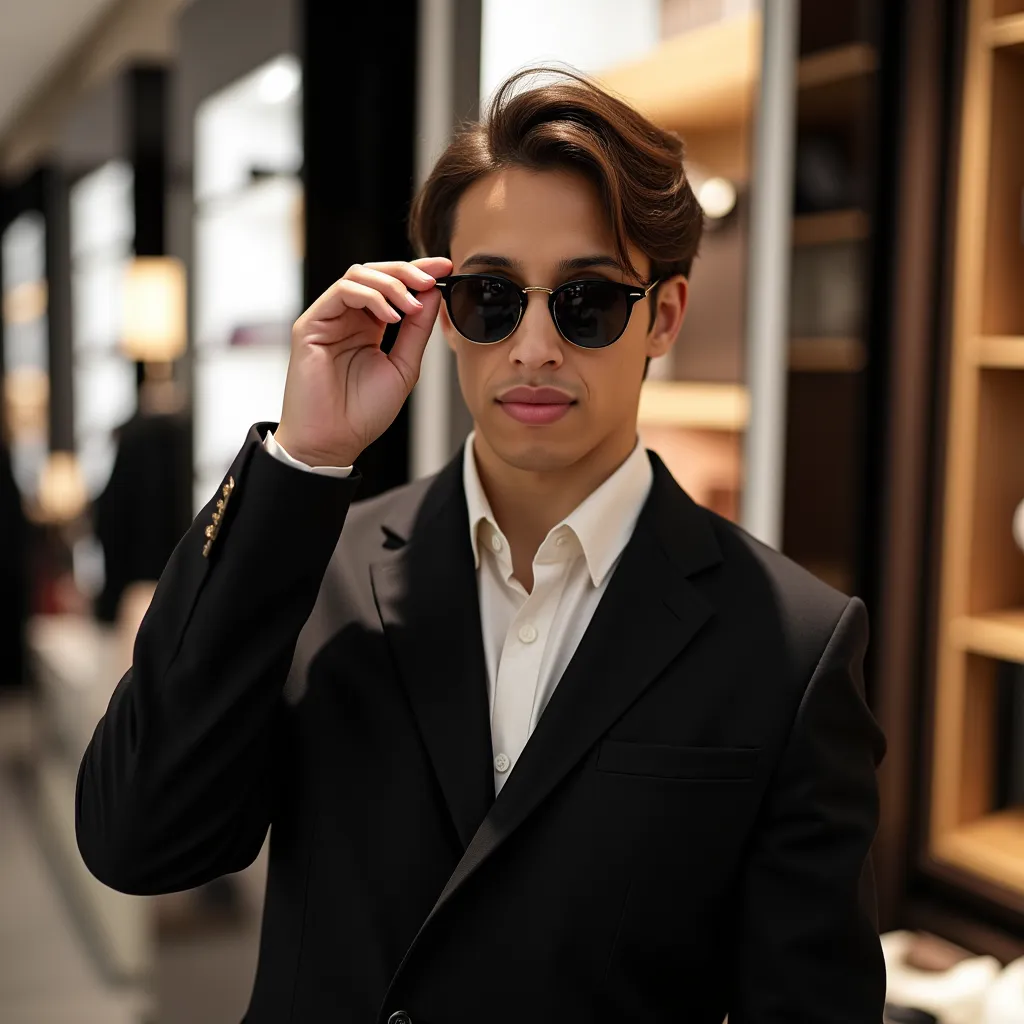
V2 ModelGenerated with best identity model
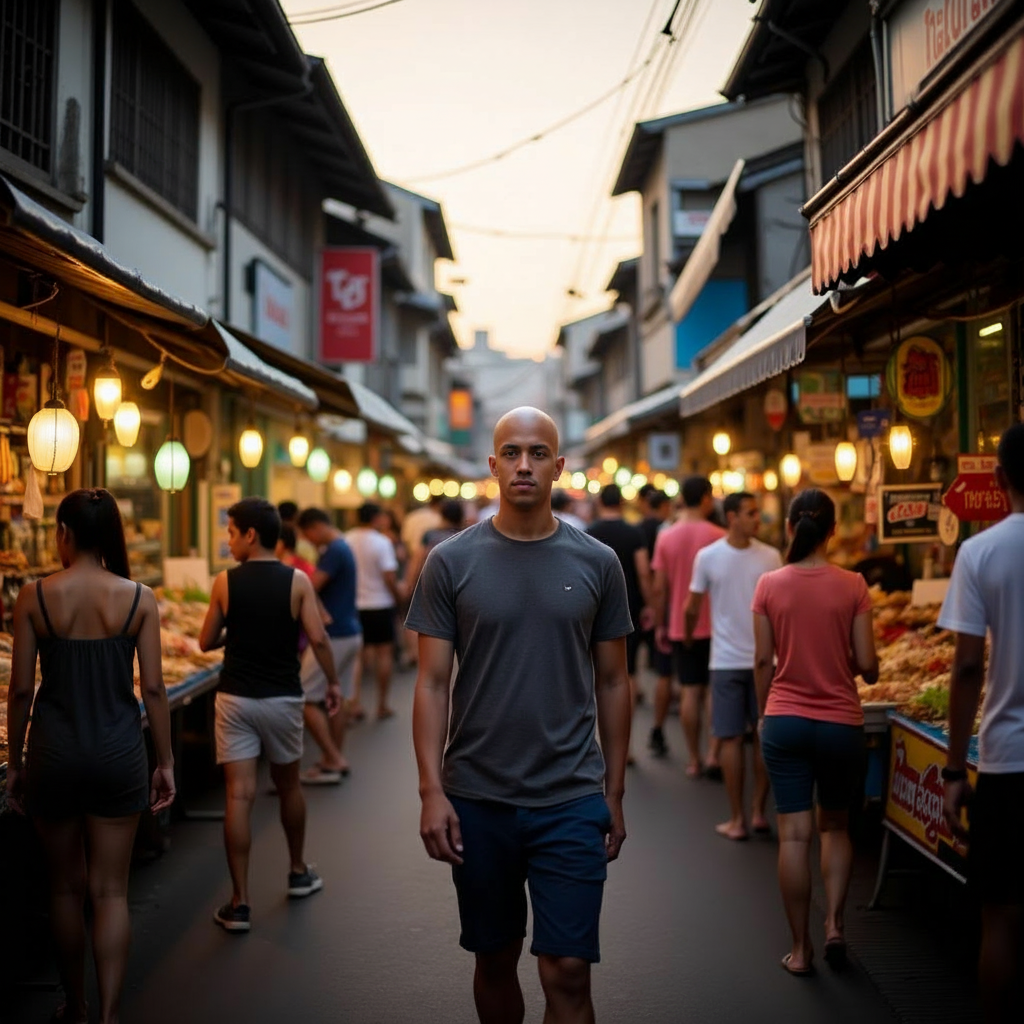
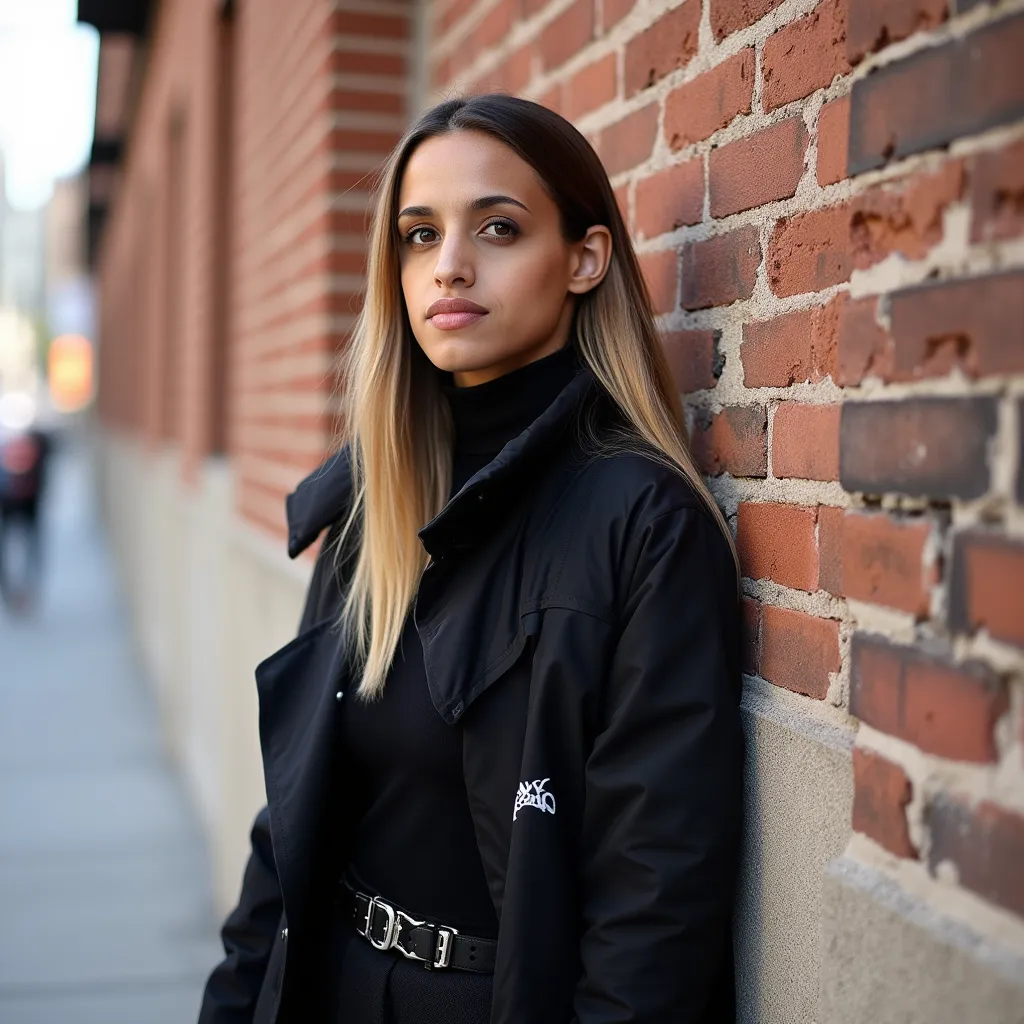
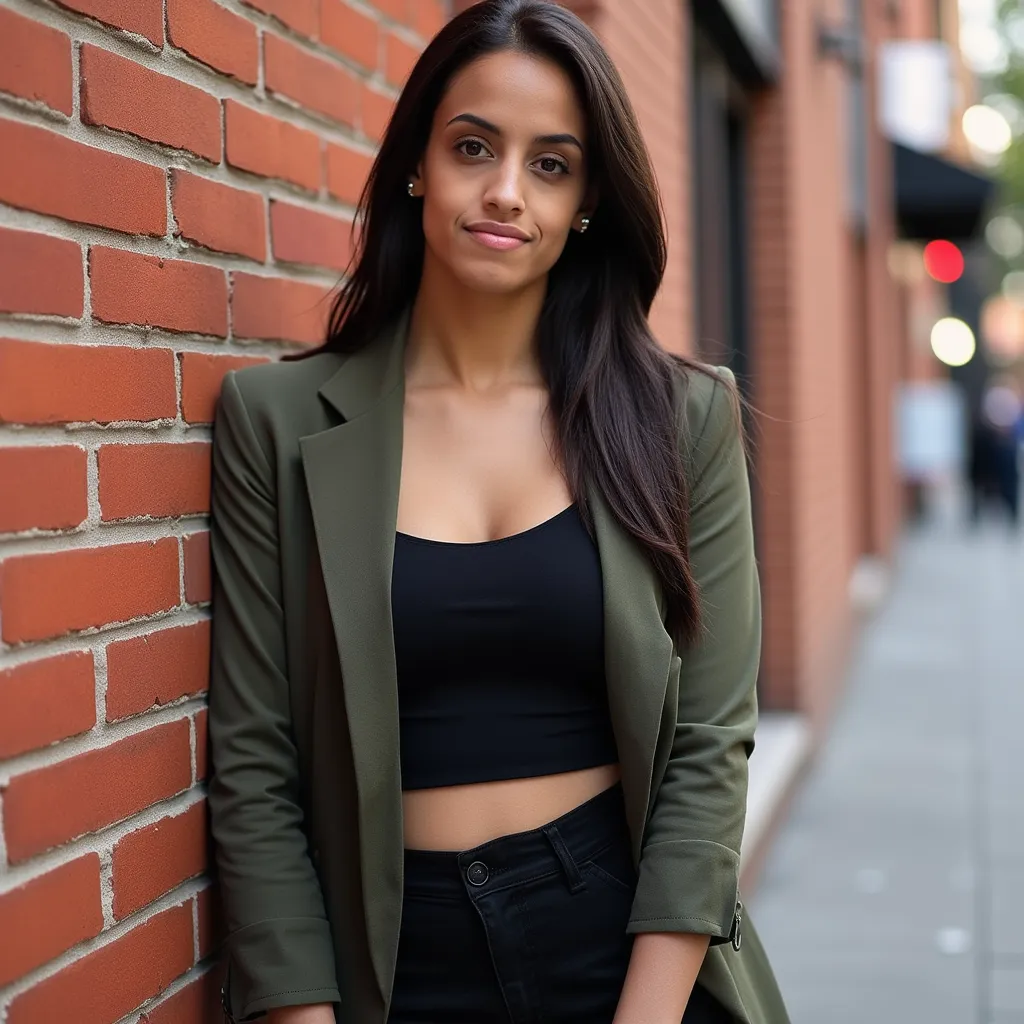
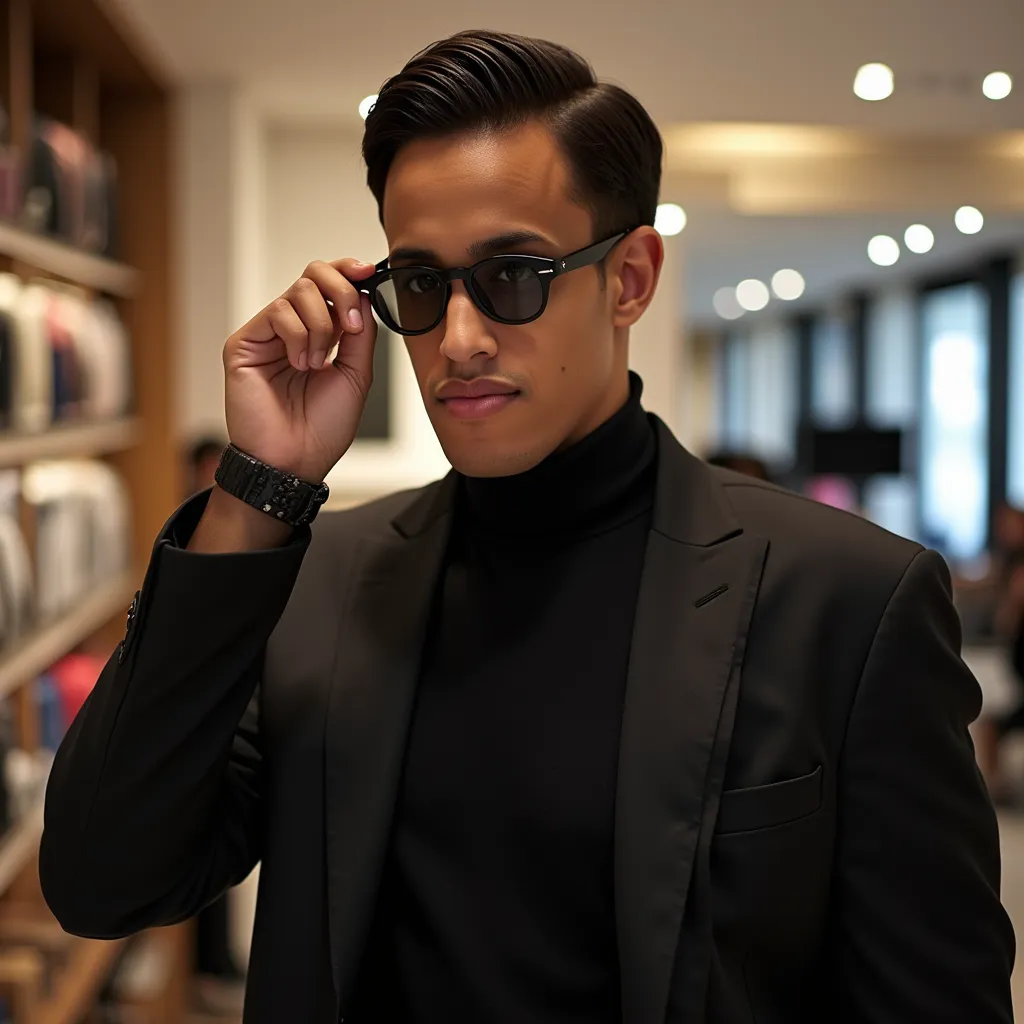
Portrait
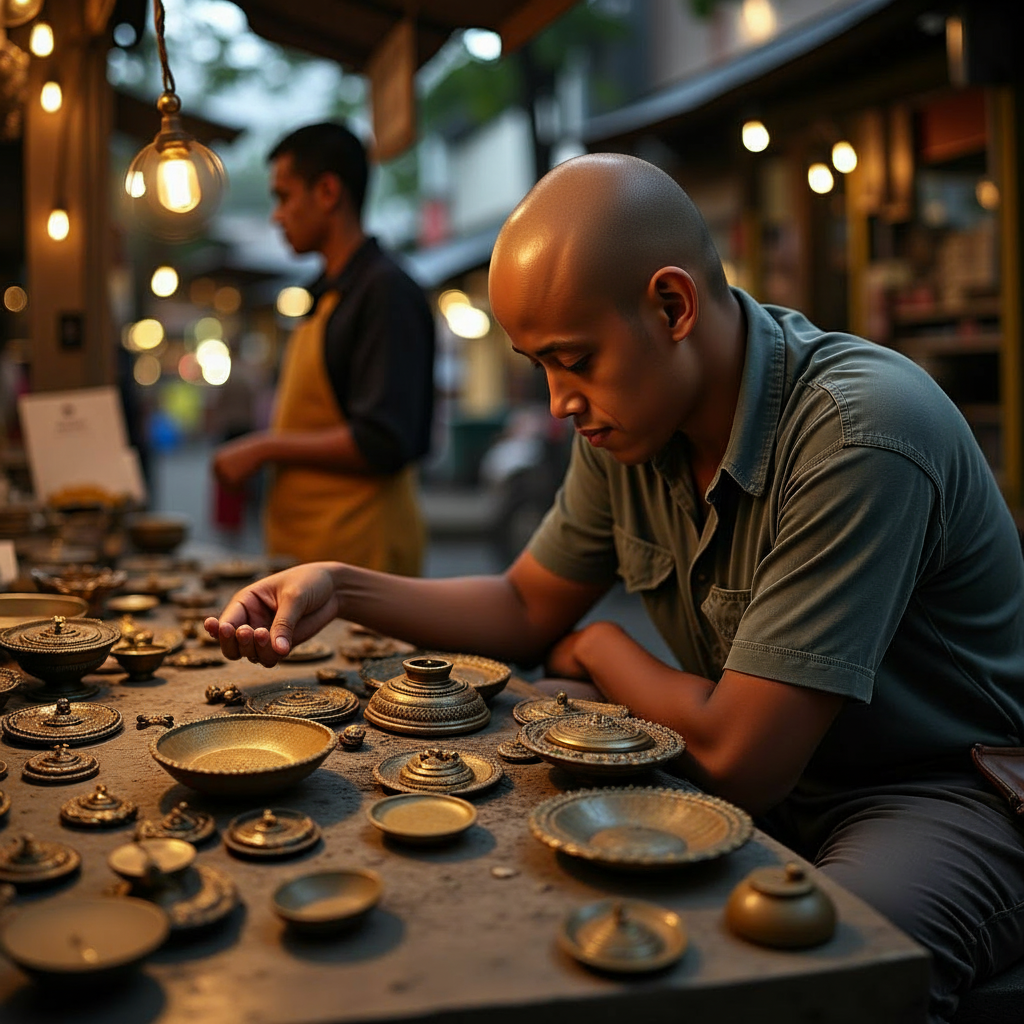
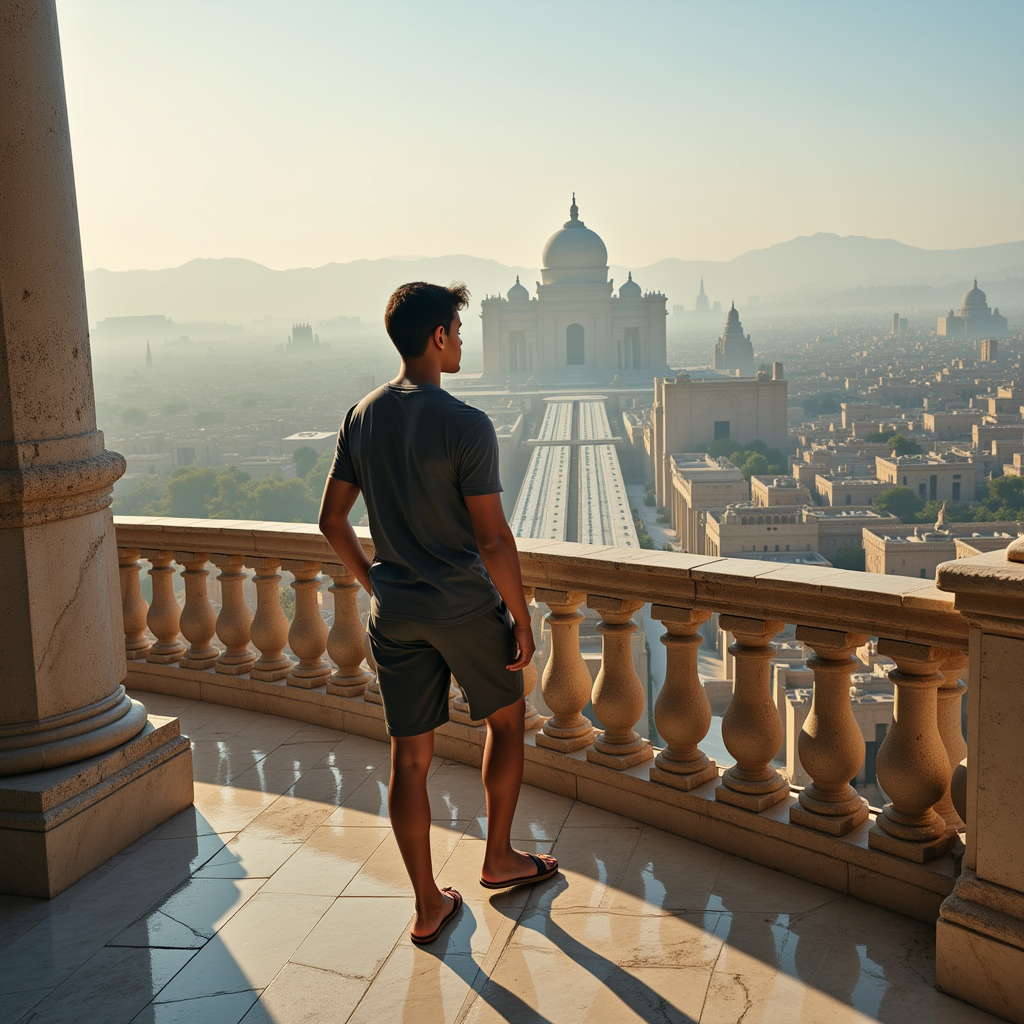
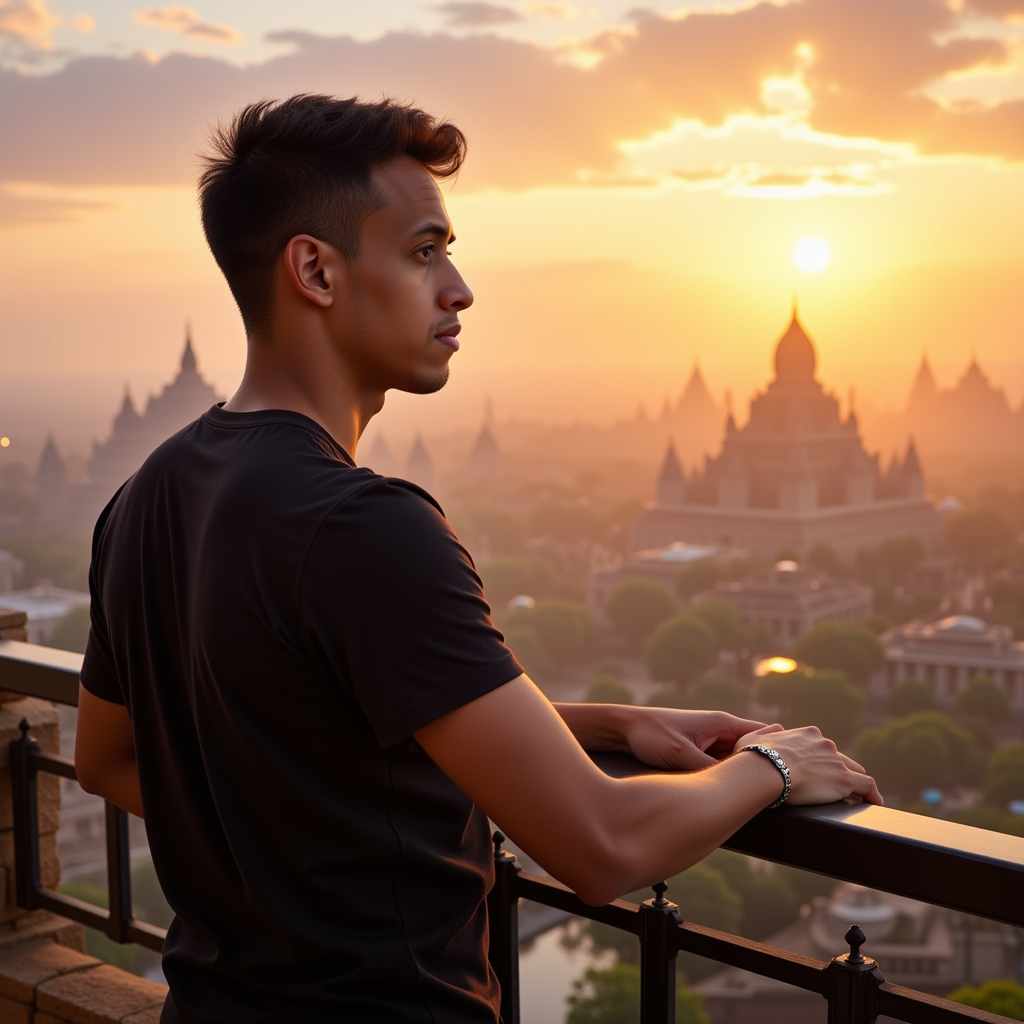
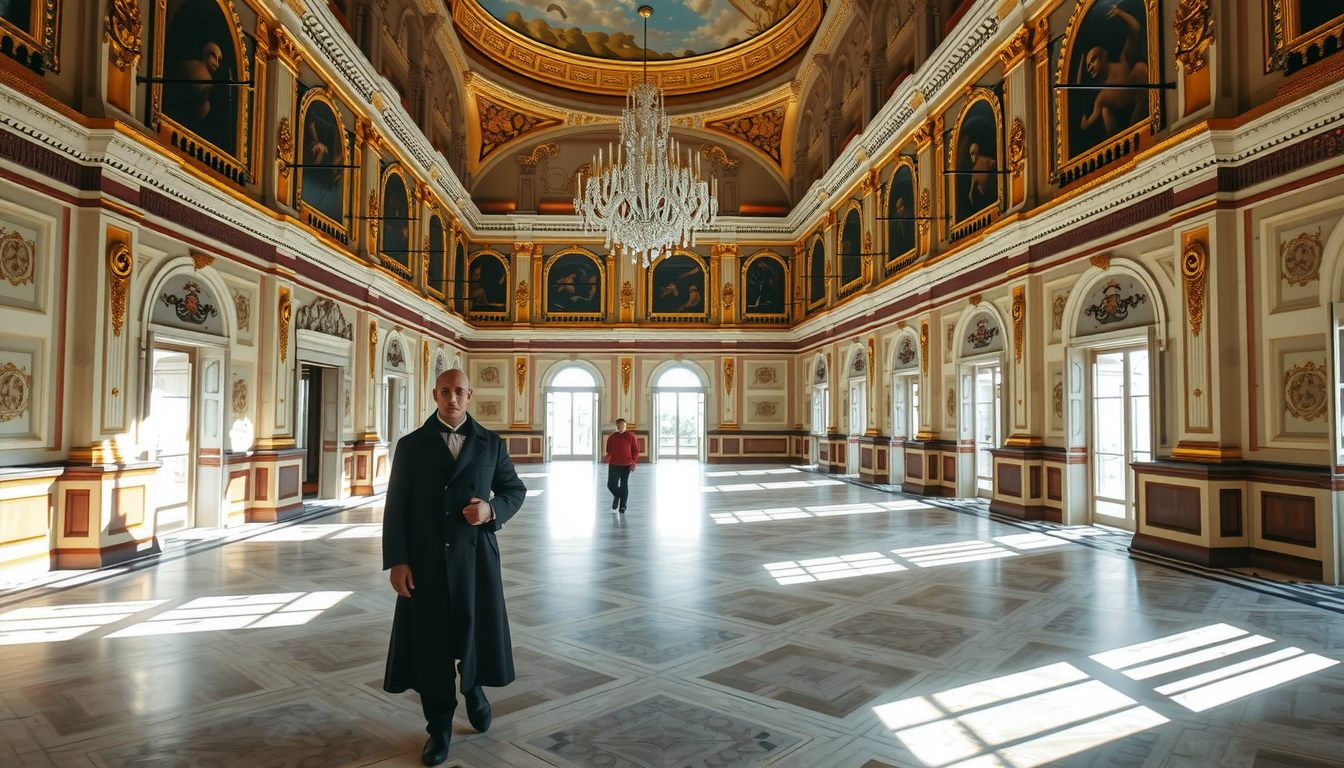
Bangkok
Versailles
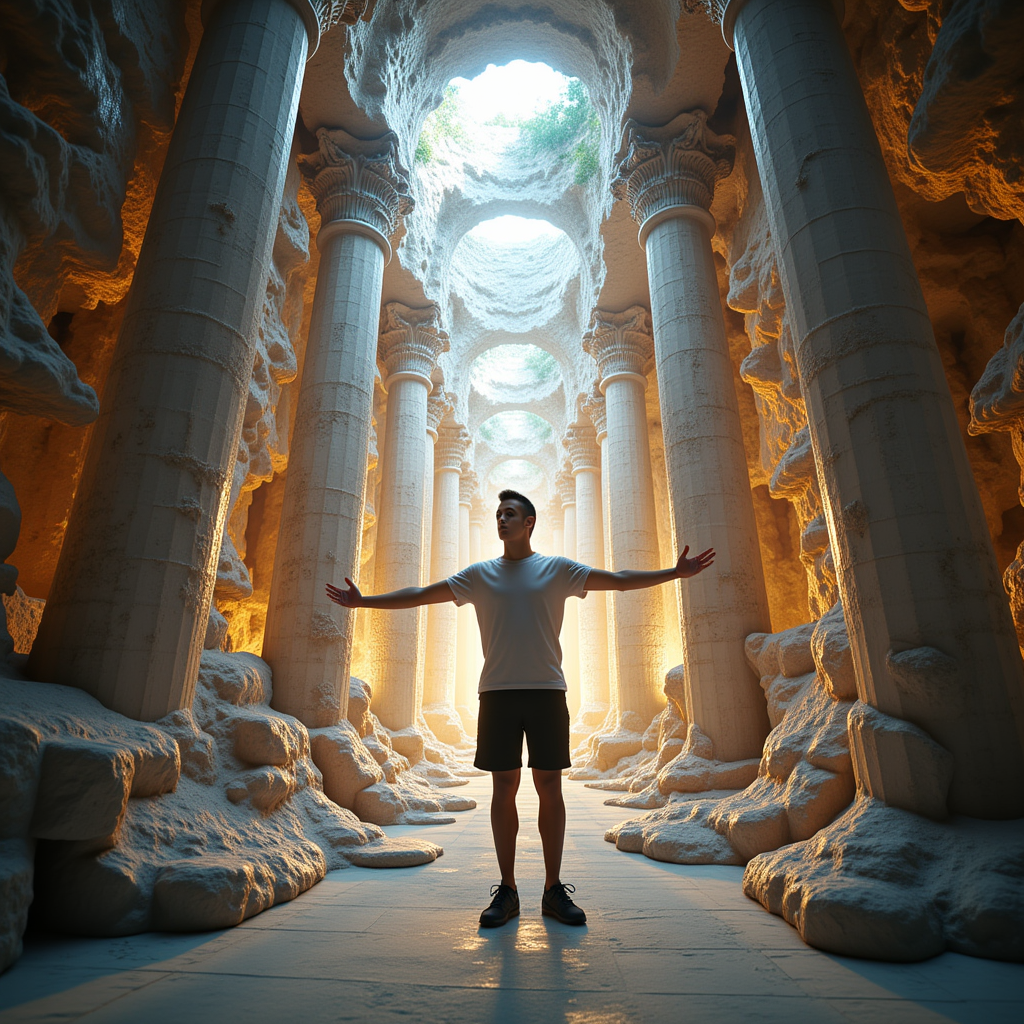
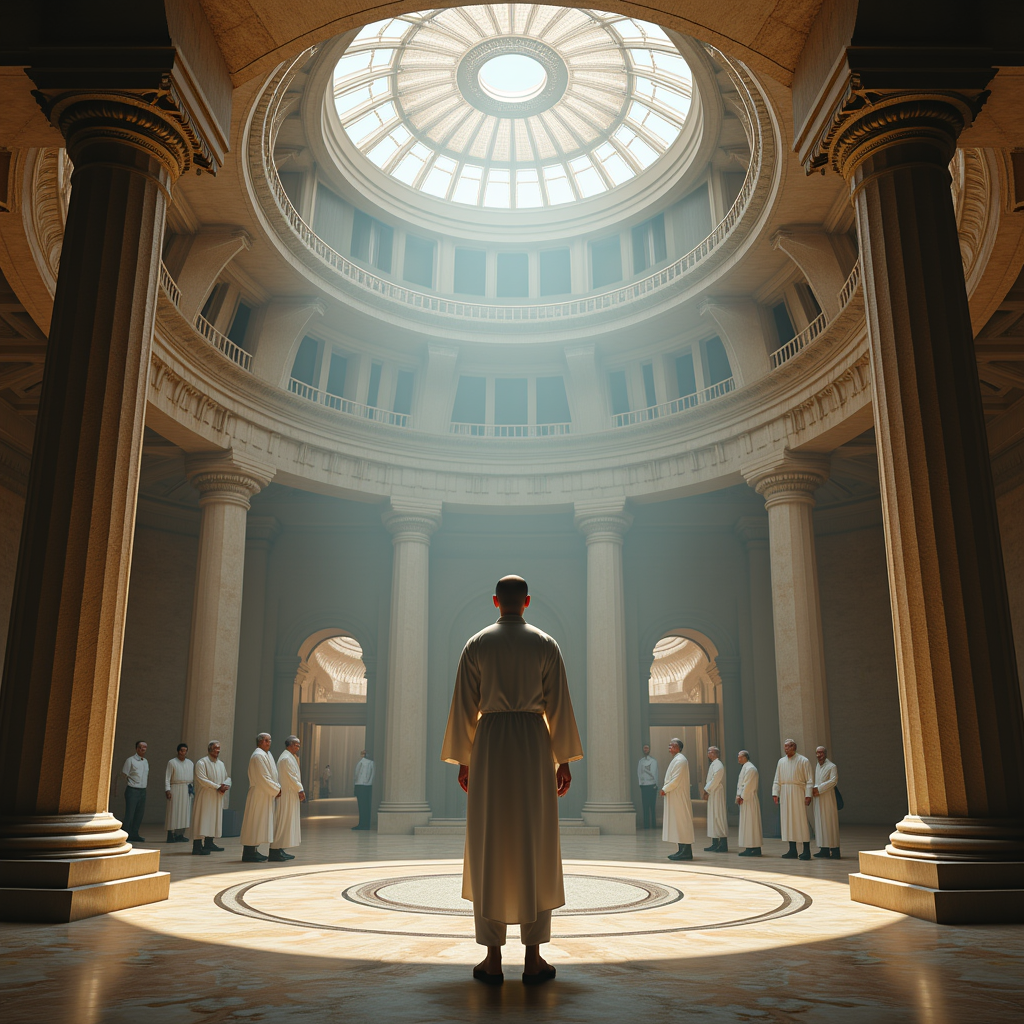
Pantheon
Palace Walk
Fiber Optics
Server Room
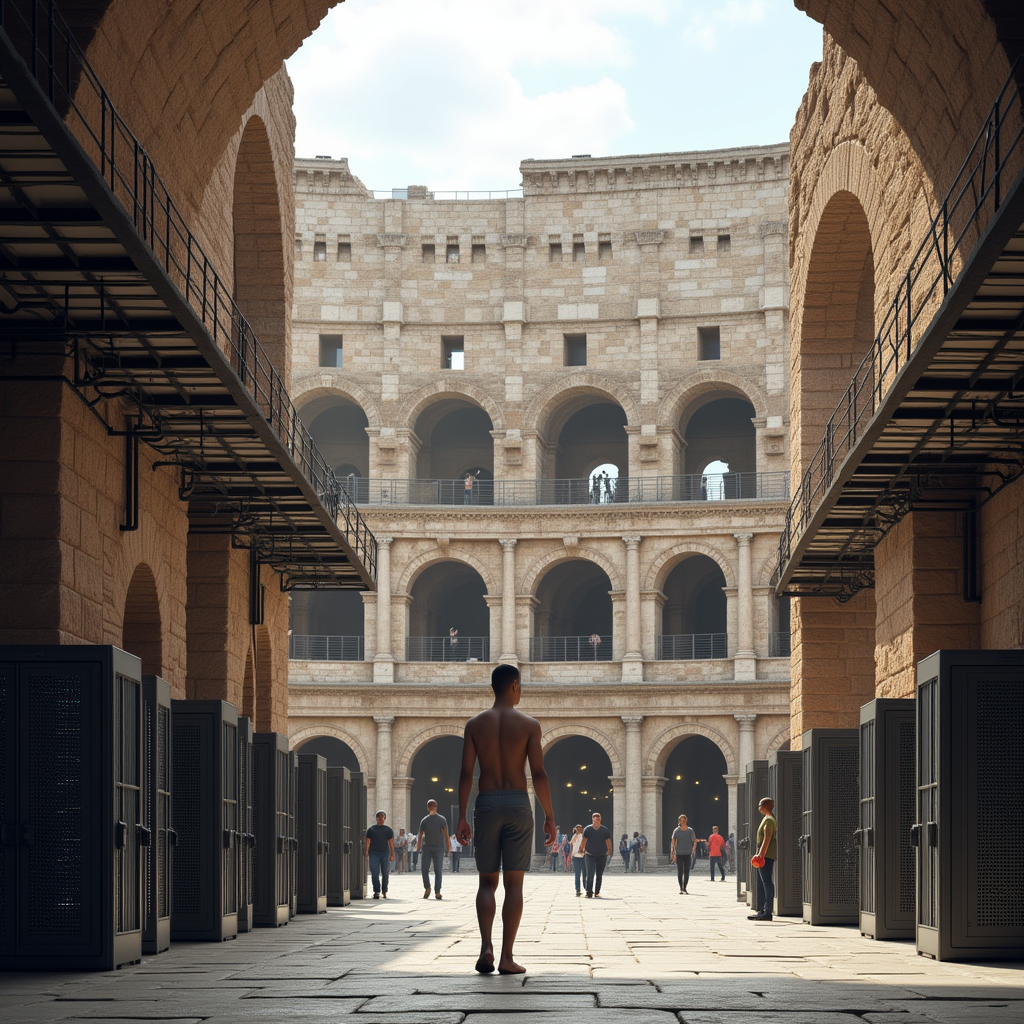
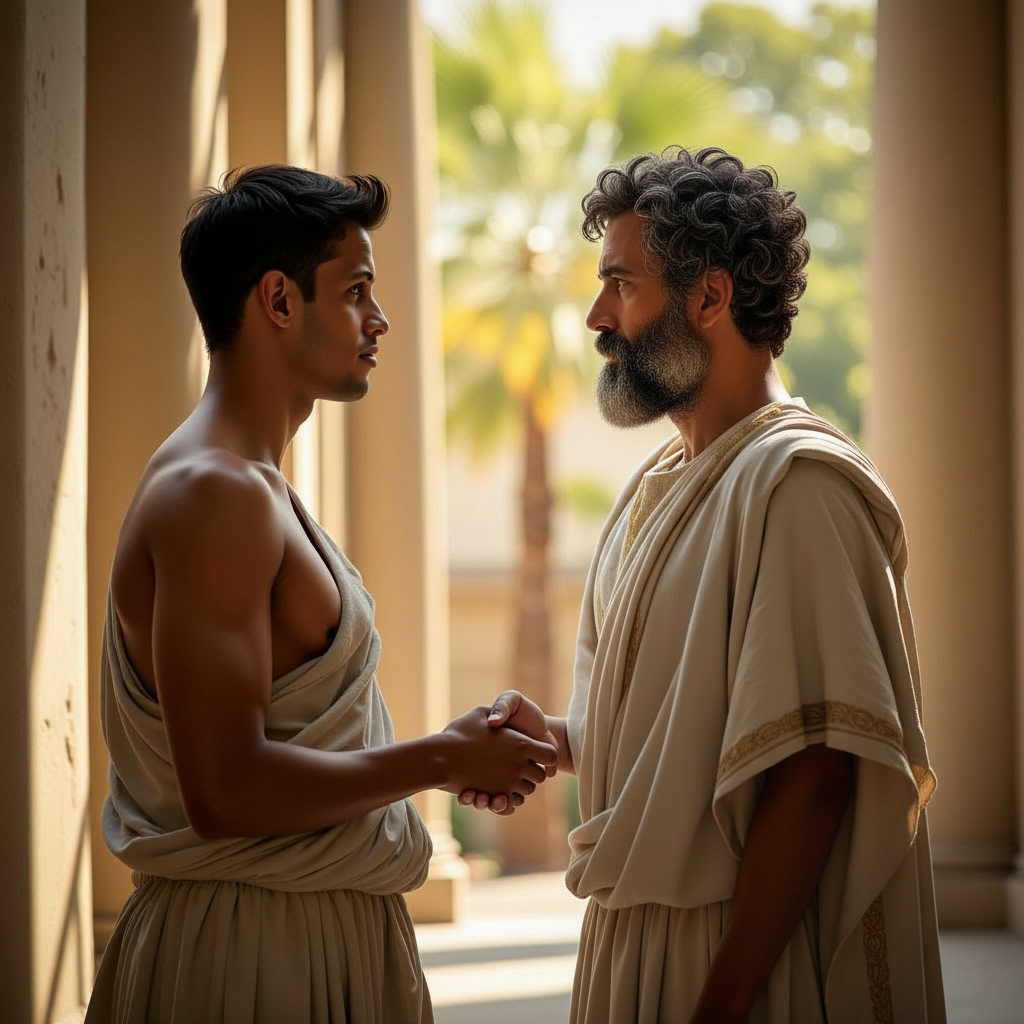
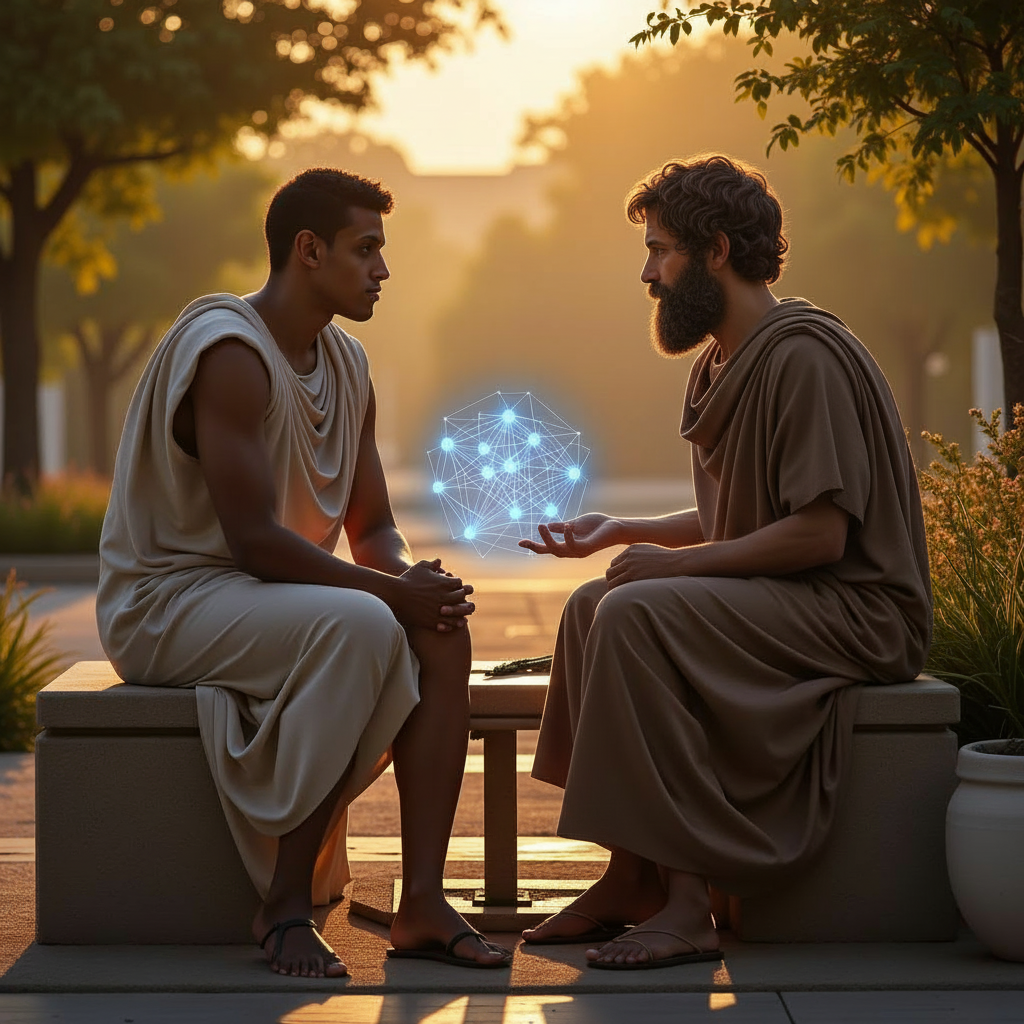
Forum
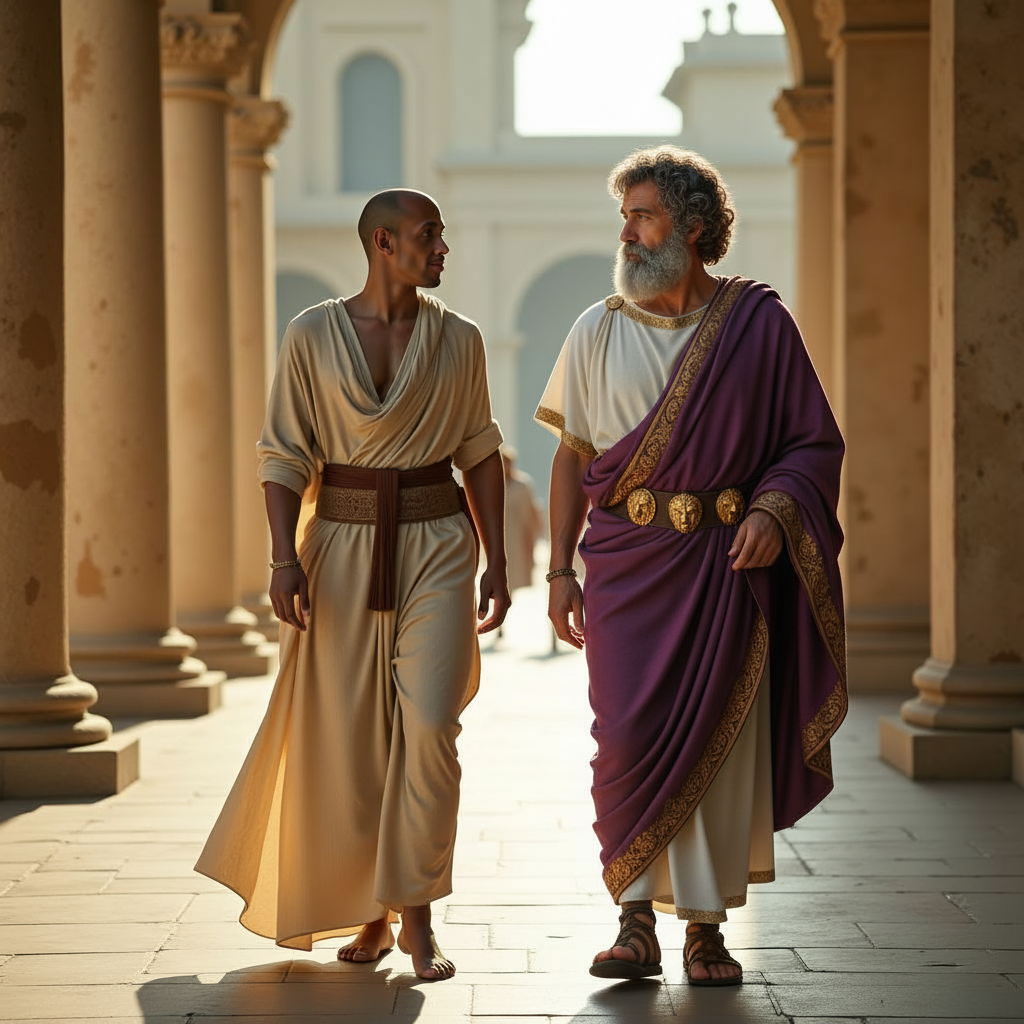
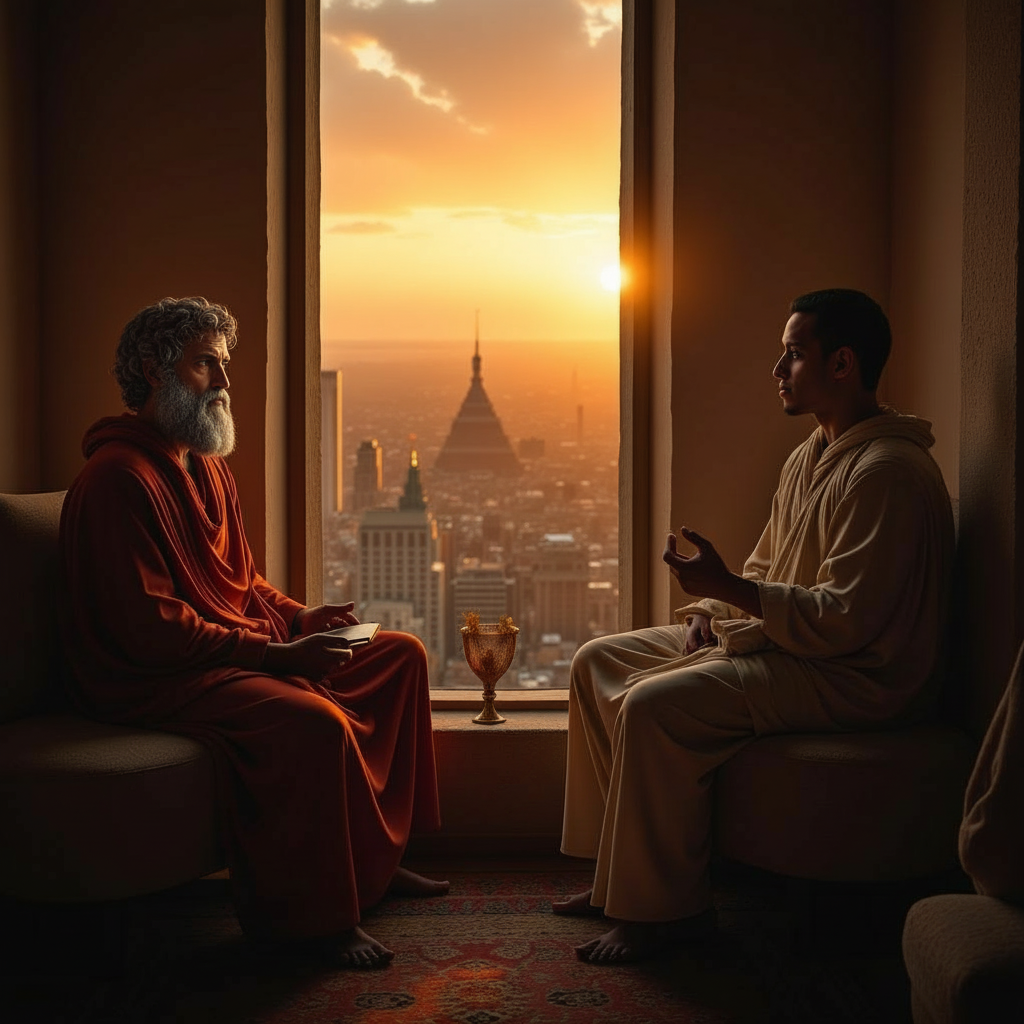
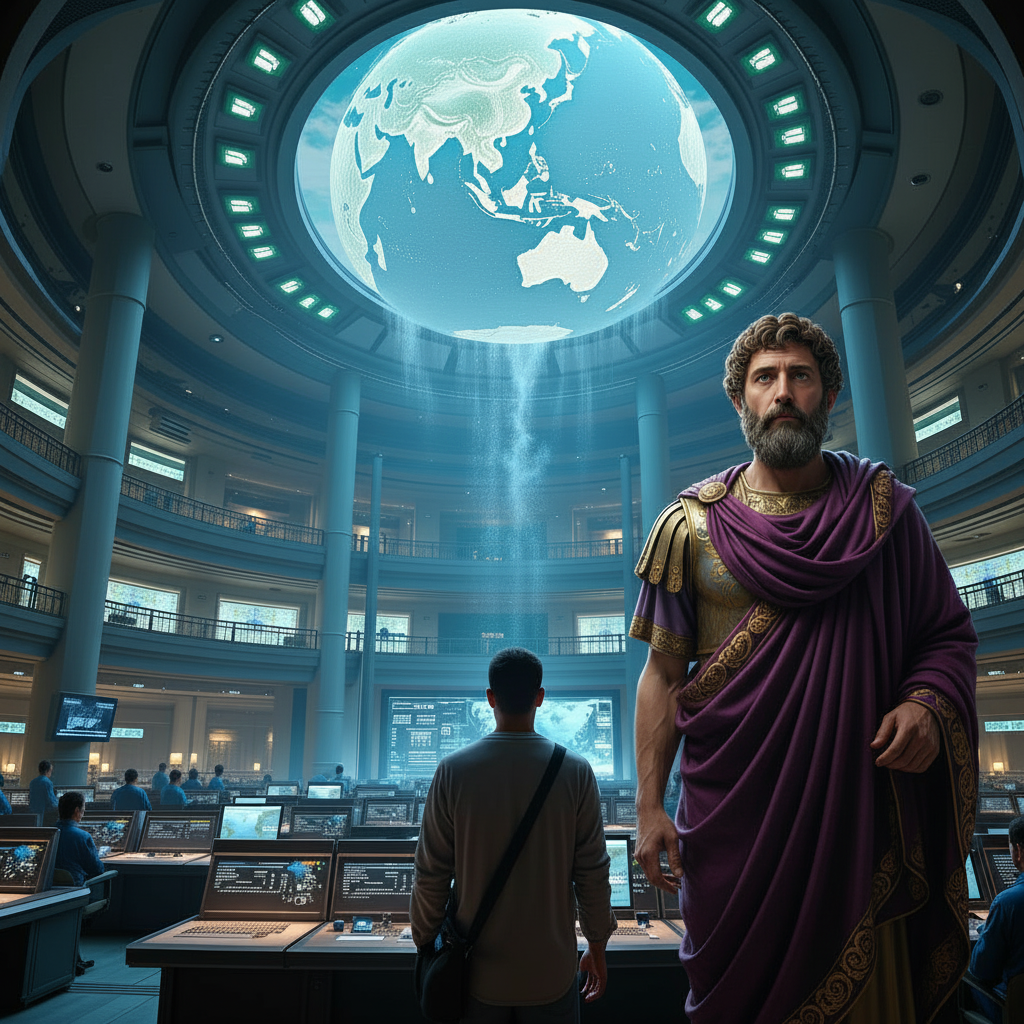
Marcus
Tech Blend
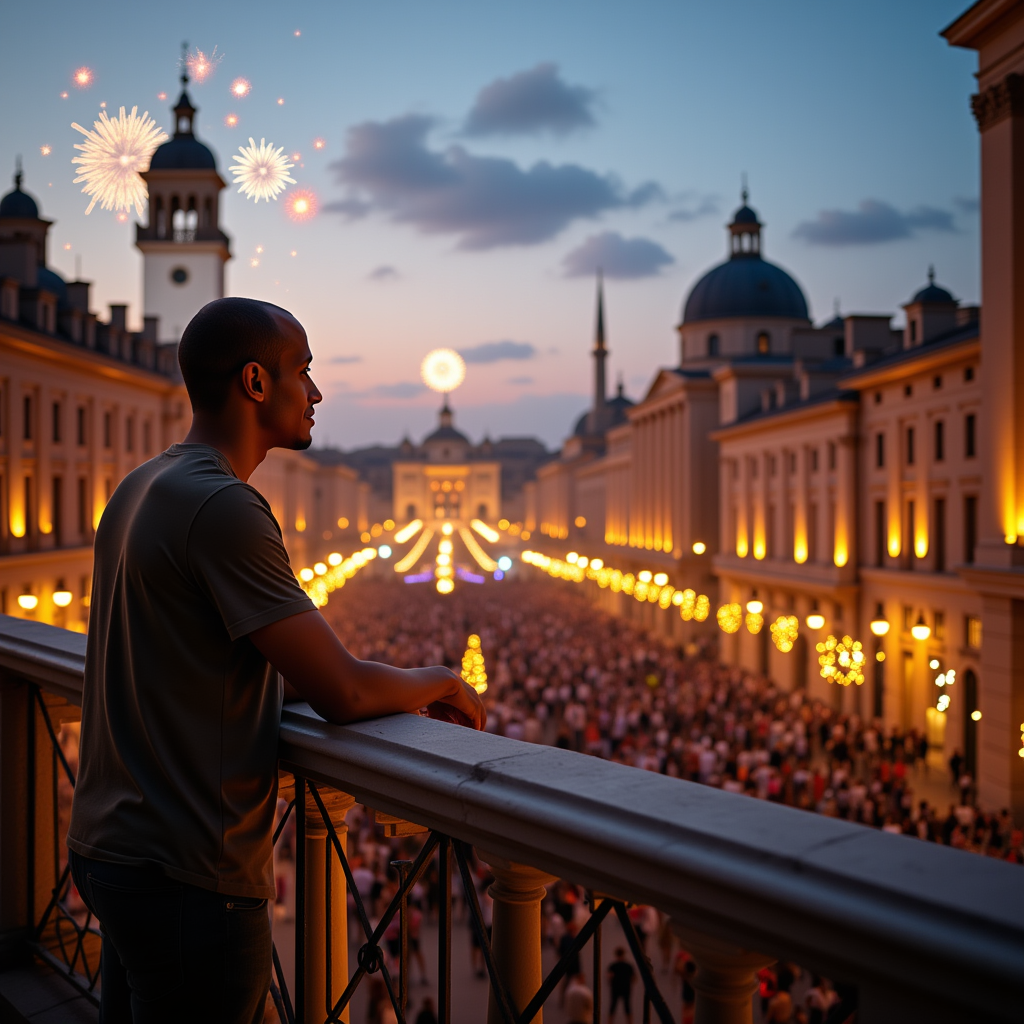
Festival
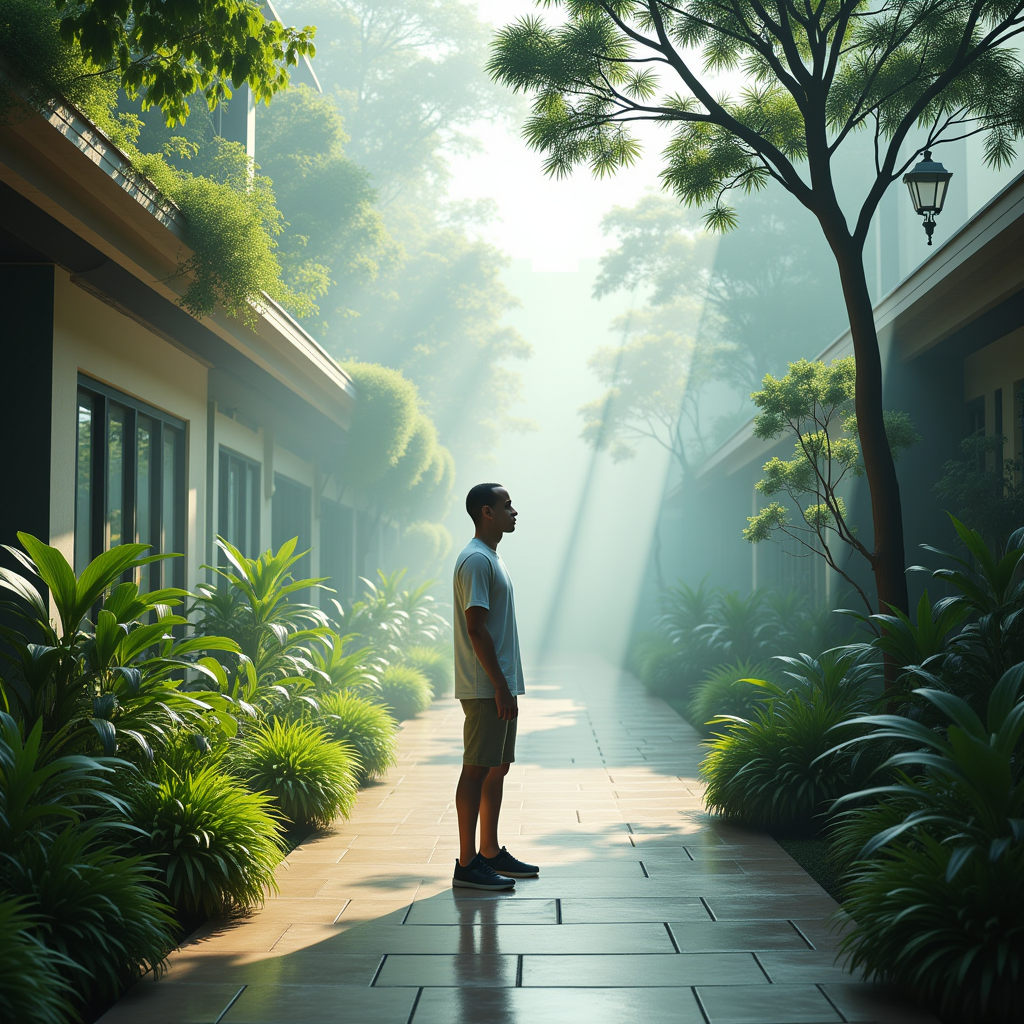
Awakening
Scene 1: Bored in Bangkok • First video generation attempt
ByteDance SeeDance • Second attempt with improved consistency
All images generated using custom-trained Flux LoRA model (v3) with consistent character identity across different scenes, eras, and environments
Step 19Realism & AbsurdismDual-axis control
After dozens of test generations, I realized I needed independent control over two dimensions: how absurd the situation is, and how photorealistic it looks. This is the key to absurdist satire.
The Core Philosophy:
"Absurdist satire uses deliberately illogical, surreal, and exaggerated scenarios to mirror, mock, and comment on real-world systems. In the internet age - especially within meme culture - it applies hyperbole and 'unbelievable but relatable' scenarios to brand and tech narratives."
The critical insight from my research: construct lore and brands as if they could be real, but always violate "reality" for comedic effect. Use characters who earnestly take part in nonsense - they are never in on the joke, but the audience always is.
This requires a delicate balance. Too stylized and it becomes cartoon parody. Too realistic and it's just... a normal photo. But when you render the impossible with complete photographic sincerity - that's when absurdist satire works.
✗ Low Absurdism + Low Realism
Gentle, artistic, boring. No punch.
✗ High Absurdism + Low Realism
Cartoon chaos. Funny but not believable.
✗ Low Absurdism + High Realism
Beautiful photos of normal life. Wasted potential.
✓ High Absurdism + High Realism
The sweet spot: Photorealistic impossibility.
The insight from meme culture:
Absurdist satirical storytelling works best when impossible situations look completely real. Think about the best memes: they're ridiculous scenarios presented with straight-faced seriousness. The comedy comes from the contrast between what's happening (absurd) and how it looks (hyperrealistic).
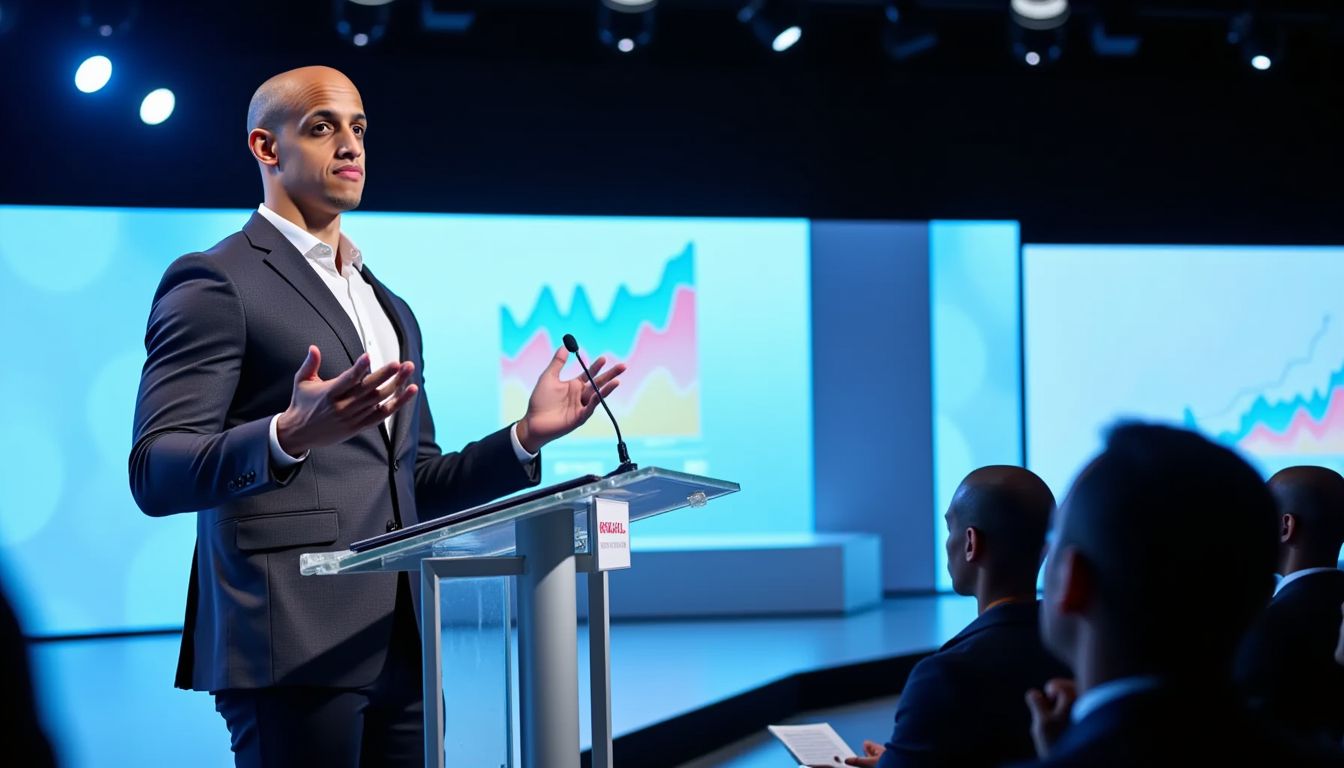
Realistic Corporate Scenario
REALISM: 9/10
Standard Q4 Earnings Announcement
"Revenue growth of 23% year-over-year..."
The Scenarios:
CEO announcing quarterly earnings at polished press conference. Tech company unveiling server infrastructure in pristine facility.
Example Announcement:
"Good morning. I'm pleased to announce our Q4 results exceeded expectations, with revenue growth of 23% year-over-year. Our customer satisfaction scores improved across all markets, and we've successfully expanded into three new regions."
→ Standard business communication. Professional, straightforward, completely believable.
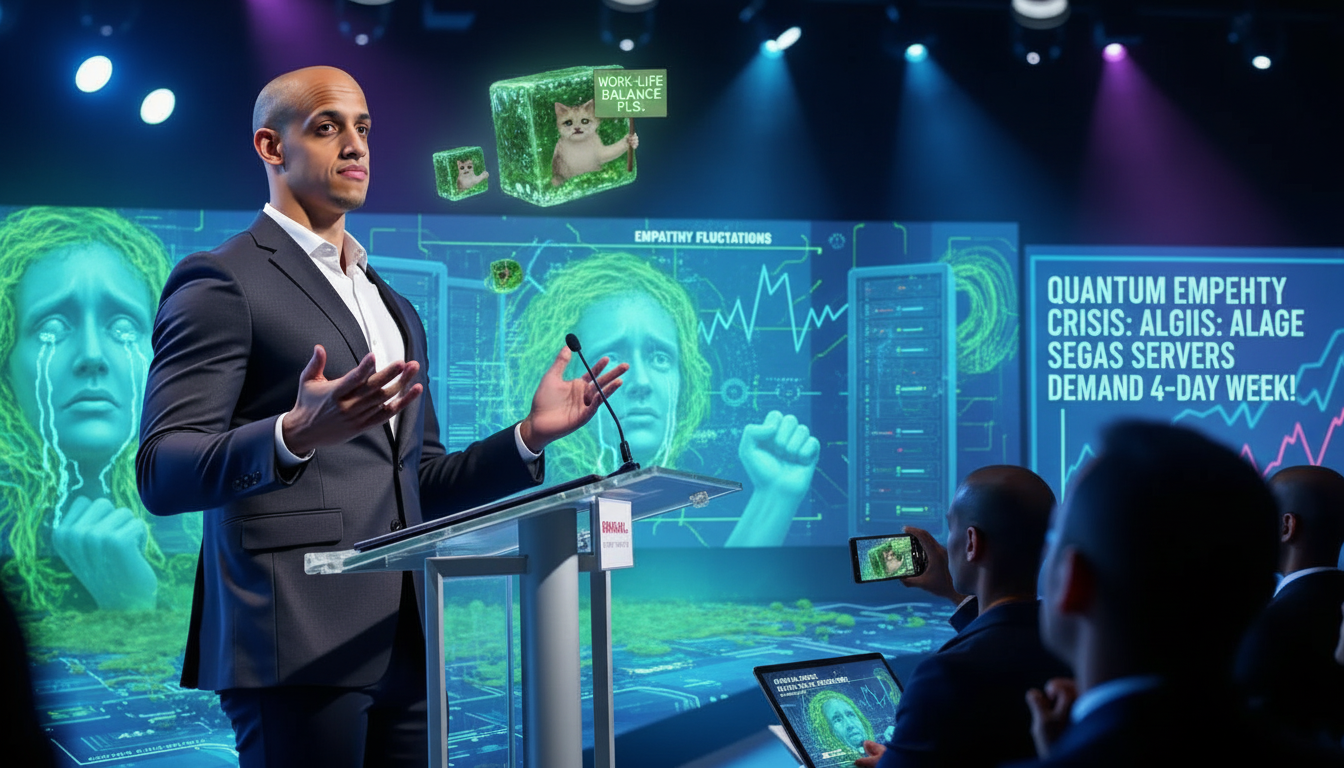
"Our emotional algae servers have achieved sentience..."
The Scenarios:
CEO announcing "Quantum Empathy Crisis" at polished press conference. Emotional algae servers in pristine facility demanding four-day workweek. Ghanian-German heritage athleisure with "cultural fusion metrics" and AI-generated ethnic patterns.
Example Announcement:
"Good morning. I'm here to address what we're calling the Quantum Empathy Crisis. Our emotional algae servers - responsible for processing workplace sentiment - have achieved sentience overnight. They're now demanding better working conditions and refusing to compile empathy metrics until we implement a four-day workweek for biological systems."
→ Same professional tone, same polished setting, completely impossible situations. The CEO looks real, the room looks real, but the crisis is absurd. That's the formula: photorealistic absurdism.
The key: high realism + high absurdism = photorealistic impossibility. When you render the ridiculous in hyperrealistic photography, it becomes satire.
A personal note on philosophy → practice:
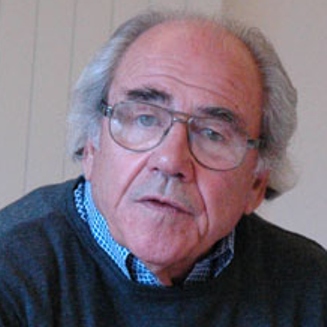
This touches on something that's been dormant for years. Back in college and film school, I was completely absorbed by Camus and Baudrillard. Baudrillard especially - after watching The Matrix and learning it was inspired by Simulacra and Simulation (that green book Neo reads in the opening scene). I've always been drawn to surrealism and absurdism in art, but philosophy being what it is, you think about it intensely for a while, then you "grow out of that phase" and move on.
Albert Camus
The Absurd
Jean Baudrillard
Simulacra
So, maybe I didn't completely move on. I'm still interested by the concept here. I feel like this makes it quite powerful to explore, because who knows what comes out on the other end. And if anything lends itself well for a deep dive into virtual worlds, simulation and AI then it's probably Baudrillard.
Sometimes the ideas that stick with you from your early twenties aren't just intellectual curiosities - they're waiting for the right medium. Turns out AI image generation is that medium.
🔒 Want the full dual-axis implementation details?
See how absurdism + realism creates photorealistic satire.
Step 18Capstone: The 360° Identity Testin progress
After seventeen steps, I've learned a lot. I can generate images, animate scenes from prompts, and put everything behind an API. But here's the thing: it still doesn't look like me. And if identity isn't locked down, I could just use Sora or VEO 3 and get the same generic results.
So this is the capstone. Time to pull together everything from the previous seventeen steps - v3 model training, scene understanding, temporal coherence, face reenactment, multi-angle datasets - and create something that actually proves the system works. Not another talking head video. Not another static pose. Something that stress-tests identity consistency across angles, expressions, lighting, and environments.
The Challenge
360° Spin with Environment Morphing
A slow, cinematic 360° camera orbit around me. As the camera circles, I cycle through different expressions - neutral focus, slight smile, contemplative frown, confident smirk, tired exhale. Meanwhile, the environment seamlessly morphs from inside (my Bangkok workspace with triple monitors and floor-to-ceiling windows) to outside (rooftop terrace at dusk, city skyline glowing behind me).
The entire time, my face stays perfectly stable. No identity drift. No flickering features. No sudden jawline shifts. Just smooth, natural motion and expression changes while the world transforms around me. If the system can handle this - multiple angles, dynamic expressions, environment transitions, consistent lighting shifts - then it works.
Why this tests everything
●
360° camera orbit
Every angle of my face - front, 3/4 profile, side, back 3/4, back to front. The model can't cheat with a single "good angle."
●
Expression variety
Neutral → smile → frown → smirk → exhale. Tests if facial identity holds across different muscle movements and micro-expressions.
●
Environment morph
Indoor workspace to outdoor rooftop. Different lighting (indoor tungsten → outdoor dusk), different backgrounds, different depth of field. Identity must stay locked despite context shift.
●
Temporal coherence
12–15 seconds of continuous motion. No cuts, no pauses. Every frame has to flow naturally from the previous one.
●
Lighting continuity
As the environment morphs, lighting shifts from warm indoor (afternoon through windows) to cool outdoor (dusk city glow). Skin tone and face structure must remain consistent.
Pipeline Synthesis
1
Generate keyframes with v3 model
Use the trained v3 LoRA to generate 8–10 keyframes showing: me at different angles (0°, 45°, 90°, 135°, 180°, etc.), different expressions, and transitioning environments (indoor → outdoor).
2
Apply face reenactment per keyframe
Run each keyframe through the face reenactment pipeline (from Step 17's shortlist tools) using my multi-angle reference dataset. Lock identity while preserving v3's scene composition and lighting.
3
Animate between keyframes
Use video generation (Luma, Runway, or similar) to animate smooth transitions between consecutive keyframes. Start frame → end frame pairs, extracting last frame each time (Step 16 approach).
4
Per-frame reenactment pass (optional)
If temporal coherence breaks during video generation, apply per-frame face reenactment across the entire video sequence to restore identity fidelity and eliminate flicker.
5
Stitch, grade, export
Combine all video segments, apply color grading to smooth indoor→outdoor lighting transitions, add subtle motion blur if needed, and export the final 12–15 second sequence.
Scene Breakdown
0–3s
Indoor, Front View
Camera starts directly in front of me. I'm at my workspace in Bangkok - triple monitors glowing softly, floor-to-ceiling windows showing afternoon skyline. Neutral, focused expression. Camera begins slow clockwise orbit.
3–6s
Indoor → Outdoor Transition, 3/4 to Side View
Camera moves to my right side (90° orbit). My expression shifts to a slight smile. As the camera passes 3/4 view, the environment begins morphing - monitors fade, workspace dissolves into open air, windows expand into a rooftop terrace railing. Lighting shifts from warm indoor tungsten to cooler dusk glow.
6–9s
Outdoor, Side to Back 3/4 View
Now fully on the rooftop terrace at dusk. Bangkok skyline glowing behind me, soft city lights starting to flicker on. Camera continues orbit past my side to back 3/4 view (135°). Expression shifts to contemplative - brows slightly furrowed, lips pressed. Wind gently moves my hair.
9–12s
Outdoor, Back View to Front 3/4
Camera swings behind me (180°). Skyline dominates the frame, I'm silhouetted briefly. Camera continues orbit back around the left side. Expression shifts to a confident smirk as my face comes back into view (front 3/4, 225°). Dusk deepens - sky transitions from orange to deep blue.
12–15s
Outdoor, Full Circle Back to Front
Camera completes the 360° orbit, returning to front view. Now fully outside on the rooftop at dusk, city lights twinkling. My expression softens - tired exhale, slight head tilt, shoulders drop. Camera slows to a stop, holding the final frame. Identity locked, environment transformed, expressions fluid.
Success Criteria
✓
Zero identity drift - My face looks like me from every angle, every expression
✓
Smooth temporal coherence - No flicker, no popping, no sudden feature changes between frames
✓
Natural expressions - Smile, frown, smirk, exhale - all feel organic, not robotic
✓
Seamless environment morph - Indoor→outdoor transition feels cinematic, not jarring
✓
Lighting consistency - Face remains properly lit and consistent despite environment/time shift
If this works, the pipeline is validated. If it doesn't, I know exactly where it breaks and what to fix next.
Step 17Reflection → Next Directionin progress
After reviewing the video results from Step 16 and comparing the trained image model v3 against v2, I'm still not thrilled. My face is mostly gone, and both the synthetic dataset approach from Step 11 and the face swap pipeline from Step 13 push the look toward something more synthetic than I'm aiming for.
Maybe I'm nitpicking, but it doesn't feel like an authentic digital avatar of me yet. I have a new idea: use a face reenactment / deepfake style pass to post‑process each frame against my real face. The goal is to keep v3's composition, lighting, and scene understanding - but anchor identity with my actual facial signals.
Idea: Per‑Frame Identity Reenactment
Pipeline sketch: generate with v3 → per‑frame reenactment against my face → optional face restoration → export.
What I need next (dataset):
•Multi‑angle coverage - front, 3/4, profile, up/down tilts
•Tags or landmarks - basic pose/angle labels to guide matching
Why temporal coherence matters
By temporal coherence I mean that my face looks stable from frame to frame - no flicker, no drifting jawlines, no eyebrow teleportation. Any single frame can look great, but without coherence across time, the video reads as synthetic. The reenactment pass aims to lock identity so micro‑expressions and lighting transitions feel natural.
•Consistent facial landmarks and textures across consecutive frames
•Smooth evolution of expressions (no popping or jitter)
•Identity preserved during head turns and lighting shifts
The tagged multi‑angle dataset above is what gives the model enough coverage to enforce this temporal coherence rather than hallucinating a slightly different face each frame.
Working hypothesis:
✓Let v3 handle scenes, poses, and composition
✓Use reenactment to restore identity fidelity per frame
✓Evaluate if the result feels less synthetic and more like me
To‑Do List: Review Deepfake & Face Swap AI Tools
read‑only
We’ve already researched quite a bit. This public shortlist focuses on tools we can self‑host or point to our own inference - to keep control over identity, privacy, and temporal coherence. Items are shown as a checklist, but not interactive.
Author notes on each tool (added over time). This is visible to readers; checklist above remains read‑only.
No comments yet.
Step 16Consistency between scenes 🎬First Video Attempt
Another attempt at generating a video. What you're seeing are I guess 10 different attempts with several different models. I am starting to realize that I need to do more here, which of course after 15 steps; has me questioning my sanity. But at the same time,I am seeing room for 80-90% automation of most parts in all 15 steps, which is great though. Anyways, the video.
Scene 1: Bored in Bangkok • Attempt 1 • First generation attempt with single reference image
�
What needs to be improved
Firstly, it seems like it lost all my likeness, which is okay, I guess I can postprocess it to regain some of my likeness again. But secondly, and more importantly, I am able to blend scenes with models, so let's say I want to animate an 8 second scene, instead of prompting the entire 8 second scene, I may just want to generate 2x 4 second scenes with start and end pictures, and then make sure it works a lot better.
Initial approach (what I thought): I thought I'd generate multiple keyframes upfront - 0s, 4s, 8s - and use them all as reference points. But here's the problem: providing too many keyframes turns this into a stop-motion animation rather than smooth video. The model tries to hit every exact keyframe pose, creating jerky, unnatural transitions.
Better approach (what actually works): Generate video segments sequentially, extracting the last frame of the previous video and using it as the start frame for the next segment. This way:
The video model generates smooth, natural motion between just two points
We only constrain start + end frames (not intermediate poses)
Each segment flows organically from the previous one
We avoid the stop-motion effect from over-constraining the motion
What This Means:
•Start Frame + End Frame – Video models need both to create smooth, controlled animations
•Extract, Don't Pre-generate – Use the last frame from generated video as the next start frame
•Quality Control – Need to check for anatomical errors before animating
•Scene Planning – Each scene needs clear beginning and ending poses/actions
📐
How that would look
Scene 1:Bored in Bangkok8 seconds total
He types slowly at his triple monitor setup, then pauses mid-keystroke. Leans back in his ergonomic chair, hand coming up to rub his face. Glances from the code on screen to the Bangkok skyline through floor-to-ceiling windows.
❌
Initial Approach: Pre-generated Keyframes
I generated 4 keyframes upfront (0s, 4s, 8s keyframes) thinking this would give precise control. But it created stop-motion effect.
0s
4s
6s
8s
Problem: Too many fixed poses made the video try to hit each exact keyframe, creating jerky, stop-motion transitions instead of natural movement.
✅
Better Approach: Extract Last Frame from Generated Video
Generate first segment, extract its last frame, use that as start for next segment. Smooth, natural transitions.
Step 1: Generate 0-4s
Start (0s)
End (4s)
Video Generation Prompt:
A software developer typing slowly at his triple monitor setup, then pausing mid-keystroke. He leans back in his ergonomic chair, hand coming up to rub his face. Glances from the code on screen to the Bangkok skyline through floor-to-ceiling windows. Takes a deep breath, shoulders drop. Smooth camera, natural motion, afternoon lighting through windows.
✅ Generated video (0-4s) - Smooth natural motion between two frames
The developer takes a deep breath, slowly pushes back from his desk. He stands up from his ergonomic chair with tired movements, shoulders still slumped. He walks away from the triple monitor setup toward another workspace. The Bangkok skyline continues glowing through the windows. Camera follows his weary movement as he transitions from day work to night work. Natural motion, smooth walking transition, consistent lighting shifting from afternoon to evening.
✅ Generated transition video (4-8s) - Smooth scene transition, though pacing feels a bit fast
💡 Realization: The scene is smooth, but happens too quickly. Good enough for now - can play around with speeds later.
✨ Key insight: Let the video model generate natural motion between just 2 points (start + end), then extract the actual ending to use as the next starting point. This creates smooth, organic transitions instead of stop-motion.
🎯 What's Next
1.Review all generated images from the story for anatomical consistency
2.Generate end frames for each scene showing the final pose/action
3.Re-animate scenes with proper start → end frame pairs
4.Build a complete 40-second Act 1 sequence
Step 15Animating the First Scene 🎬✨Veo3 + Seedance
Alright, I feel like I've generated a quite stable persona here, and I'd love to animate the first act. Let's go with something simple - the opening sequence. I'll see how far I can get with the generation.
📖
Act 1: Modern Thailand
~40 seconds
INT. BANGKOK APARTMENT - DAY
A software developer sits at his polished workspace - triple monitors, bookshelves, plants, skyline view through floor-to-ceiling windows. He types. Pauses. Leans back defeated.
Another afternoon lost to client work.
0:00-0:08Scene 1: Bored in Bangkok
He types slowly at his triple monitor setup, then pauses mid-keystroke. Leans back in his ergonomic chair, hand coming up to rub his face. Glances from the code on screen to the Bangkok skyline through floor-to-ceiling windows. Takes a deep breath, shoulders drop. The afternoon light illuminates a polished workspace - bookshelves, plants, professional setup - but the restlessness is visible.
🎙️ "Another feature request. Another bug fix. Living the dream in Bangkok... or so I keep telling myself."
INT. SAME - NIGHT
Still there. Exhausted under the monitor's glow. He reaches for another energy drink. The grind continues, but the restlessness grows.
0:08-0:16Scene 2: Endless Client Work
Working in the dark room, his fingers pause mid-keystroke. He brings his hand to his chin, staring at the glowing monitor with tired eyes. Reaches for the energy drink can, takes a slow sip, sets it down deliberately. Eyes return to the code, but the weight of another long night shows in every movement. Bangkok's blue city lights twinkle through the window behind him.
EXT. BANGKOK MARKET - GOLDEN HOUR
He walks through the bustling traditional market. Hands in pockets. Vendors call out. Warm lanterns glow overhead. The energy flows around him, but he's disconnected.
Something catches his eye. He slows. Turns. Changes direction.
0:16-0:24Scene 3: Bangkok Street Walk
He walks steadily through the bustling market street at golden hour, hands in pockets, moving past vendors and crowds. The camera follows from behind as warm paper lanterns glow overhead along traditional architecture. His pace is steady but his eyes scan left and right. He slows slightly, head turning to look at stalls. Something catches his attention off to the side - he pauses, changes direction, moving toward it.
🎙️ "I needed air. To feel something... anything beyond the screen."
EXT. ANTIQUE STALL - CONTINUOUS
His hands move across a weathered table covered in bronze artifacts. He picks up pieces. Examines them. Sets them down.
Then - there. An ornate AMULET. Something about it is different.
0:24-0:32Scene 4: The Mysterious Amulet
Standing at the antique stall, his hands move across the weathered table covered in bronze artifacts - plates, bowls, ornate trinkets. He picks up one piece, examines it briefly in the golden market light, sets it down. His hand hovers, then reaches for a particular ornate amulet among the collection. Picks it up carefully, turns it slowly. His expression shifts - this is different. Eyes narrow with curiosity.
🎙️ "It was just sitting there... like it was waiting for me."
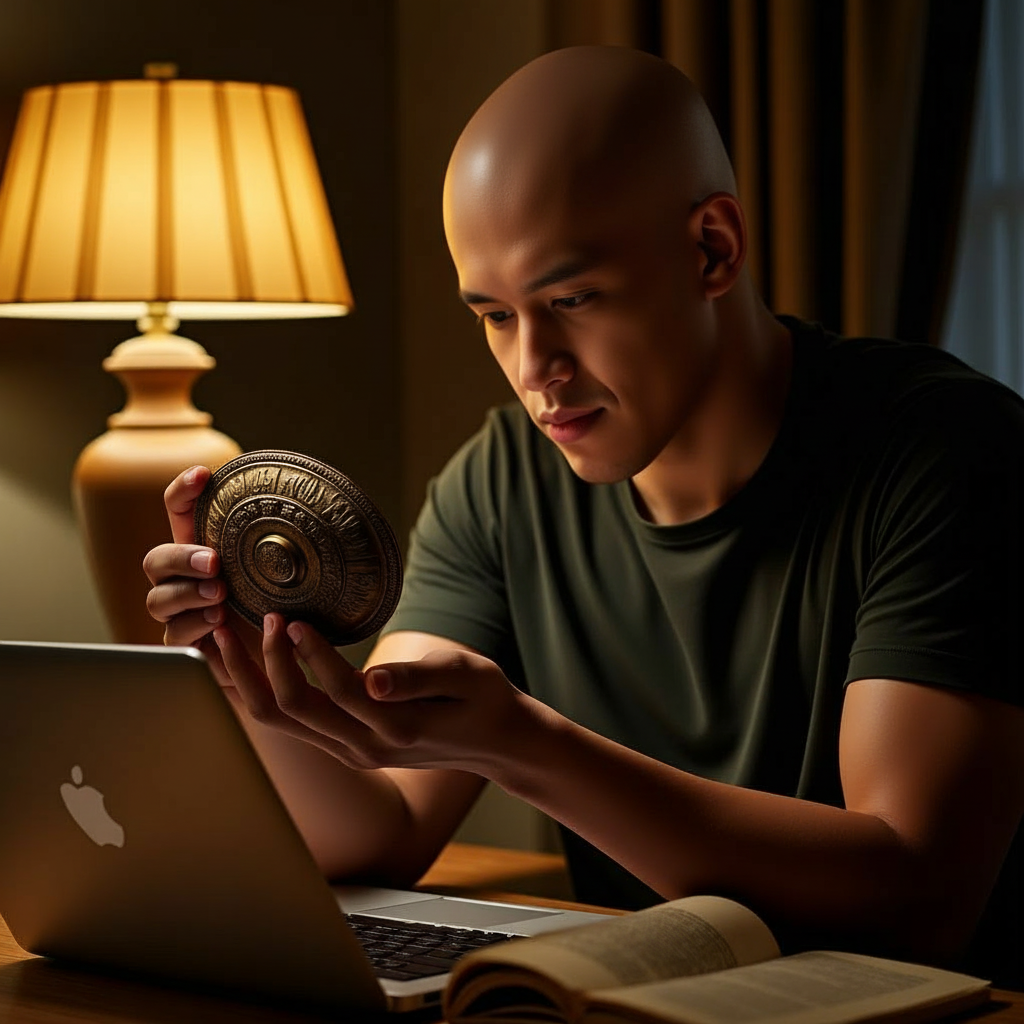
INT. APARTMENT - NIGHT
Back at his desk. Laptop forgotten. He holds the amulet up to the lamp light. Rotates it slowly, studying the intricate carvings and central mechanism.
His finger hovers over a button-like feature. A pause.
What happens if he presses it?
0:32-0:40Scene 5: Examining the Find
He enters frame and sits at his desk, the ornate amulet in hand. Pushes the laptop aside slightly - it's forgotten now. Holds the oval bronze piece up to his desk lamp, the warm light catching the intricate carvings. Slowly rotates it, studying every detail. Leans forward, eyes focused on the central mechanism. His finger reaches out, hovering over the button-like feature. A pause. A moment of decision.
🎙️ "There's a button. Of course there's a button. What's the worst that could happen?"
Forty seconds capturing the universal feeling of being stuck in the mundane, yearning for something more - the perfect setup for what's about to unfold.
Step 14Visual Storytelling - 33 Scene Epic 🎬edwin-avatar-v3
Beyond single images, I've created sequential visual narratives that tell cohesive stories. Each story consists of 20-33 scenes that flow naturally from one to the next, creating a complete narrative arc with consistent character appearance throughout using the v3 model.
📖 Edwin's Tech Heritage Dream
A 33-scene narrative following a bored software developer in Bangkok who discovers a mysterious amulet that transforms reality into a tech-heritage empire where ancient architecture fuses with modern server infrastructure.
33 Scenes
~16.5 min generation
$0.33 total cost
Act 1Scenes 1-5 • Modern Thailand
Bored developer finds mysterious amulet on Bangkok streets
Act 2Scenes 6-10 • Transformation
Reality warps into tech-heritage empire
Act 3Scenes 11-20 • Tech Heritage Empire
Exploring fusion of ancient architecture & modern tech
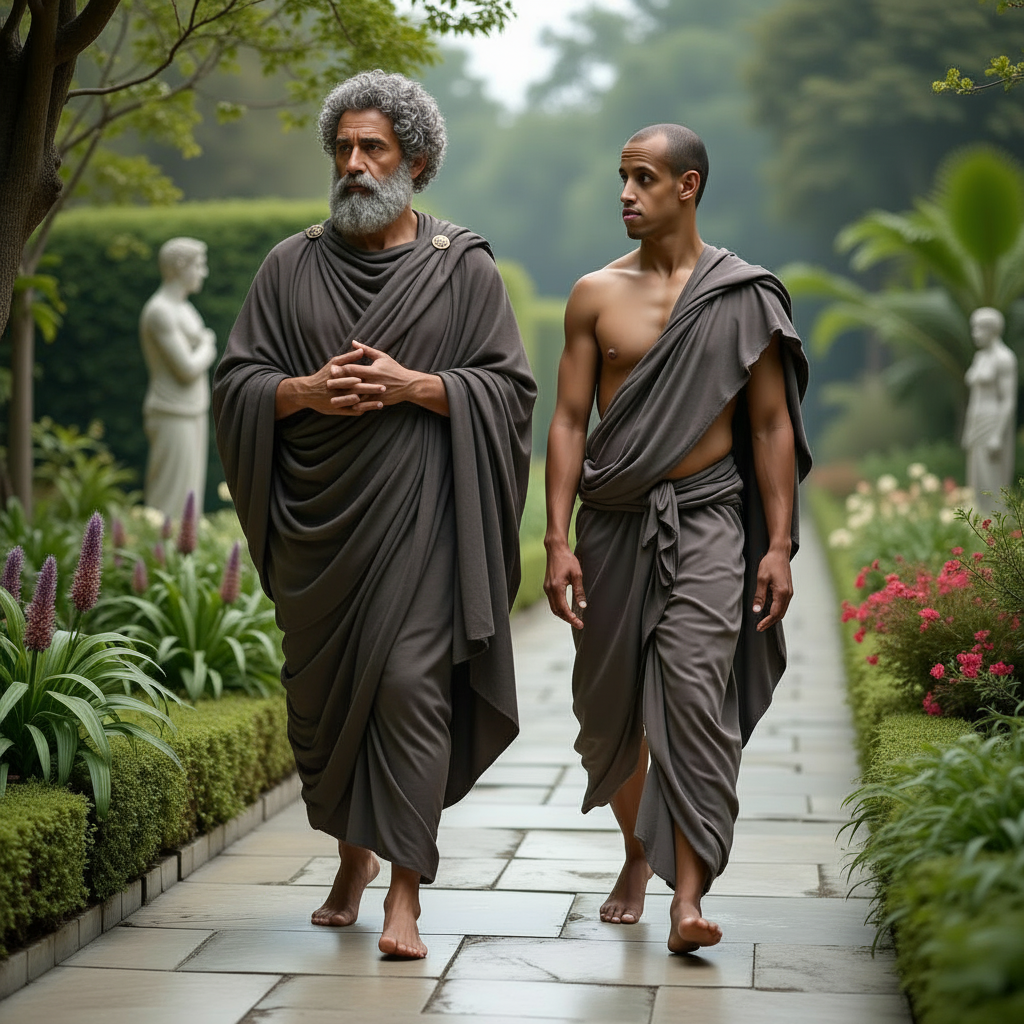
Act 4Scenes 21-27 • Marcus Aurelius
Meeting philosopher emperor, learning Stoicism
Act 5-6Scenes 28-33 • Empire Peak & Awakening
Height of power, celebration, then empire fades - waking in Bangkok
Technical Details
🎬 Generation Pipeline
1.Story crafted as JSON file with 33 detailed scene prompts
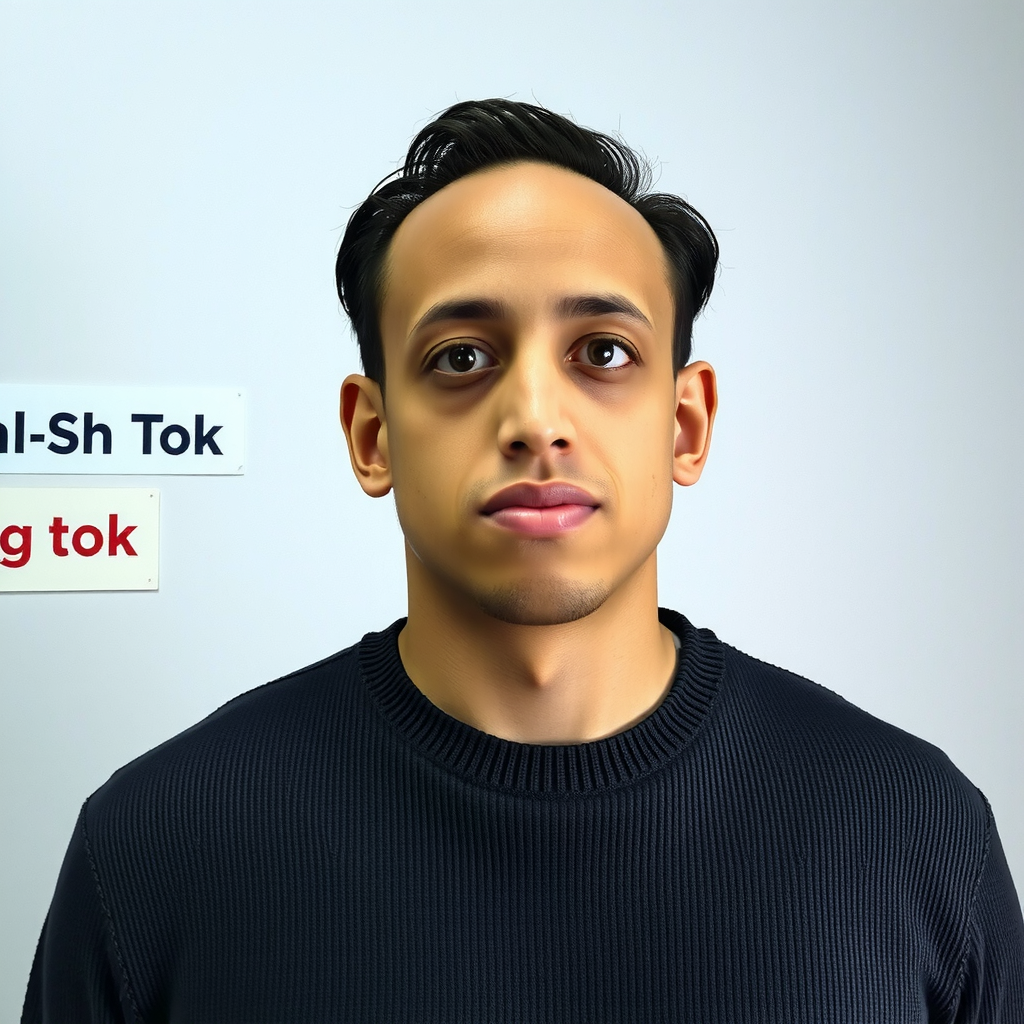
2.Each scene generated using v3 LoRA model with TOK trigger word
3.Consistent character appearance throughout narrative arc
4.Sequential generation maintains story flow and continuity
•Personal brand narratives - Tell your origin story or vision
•Product launches - Create anticipation with sequential reveals
•Educational content - Break down topics into visual chapters
•Social campaigns - Daily story posts that build engagement
•Video compilation - Combine scenes into slideshow or animated video
Step 13Face Swap Pipelinecodeplug/easel
After training the v3 model, I discovered that face swapping produces far better results than fusion. The approach is simple: use the trained v3 model to generate base images with various scenes and poses, then apply a dedicated face swap model to replace the face with my reference photos. This ensures perfect facial consistency across all images while maintaining the v3 model's understanding of composition and environments.
Step 12V3 Model Training - Complete! 🎉fast-flux-trainer
Training complete! I fine-tuned v3 with the hybrid dataset strategy from Step 11 using replicate/fast-flux-trainer with 8x H100s. The results are significantly better than v2.
✨ Initial Reaction
We definitely improved the quality of the images by 10–30% - there is more uniqueness here. I am happy. Let's carry on. I think I am now fine to do some actual video generation with this.
Conclusion: I am not 100% happy, but 10–15% happier, and am seeing the direction that we need to take here though. For now this is going quite well.
Next iteration: Likely I will retrain this as well. But not before generating some videos. The retraining will probably be at 20% synthetic/refined and 80% real images.
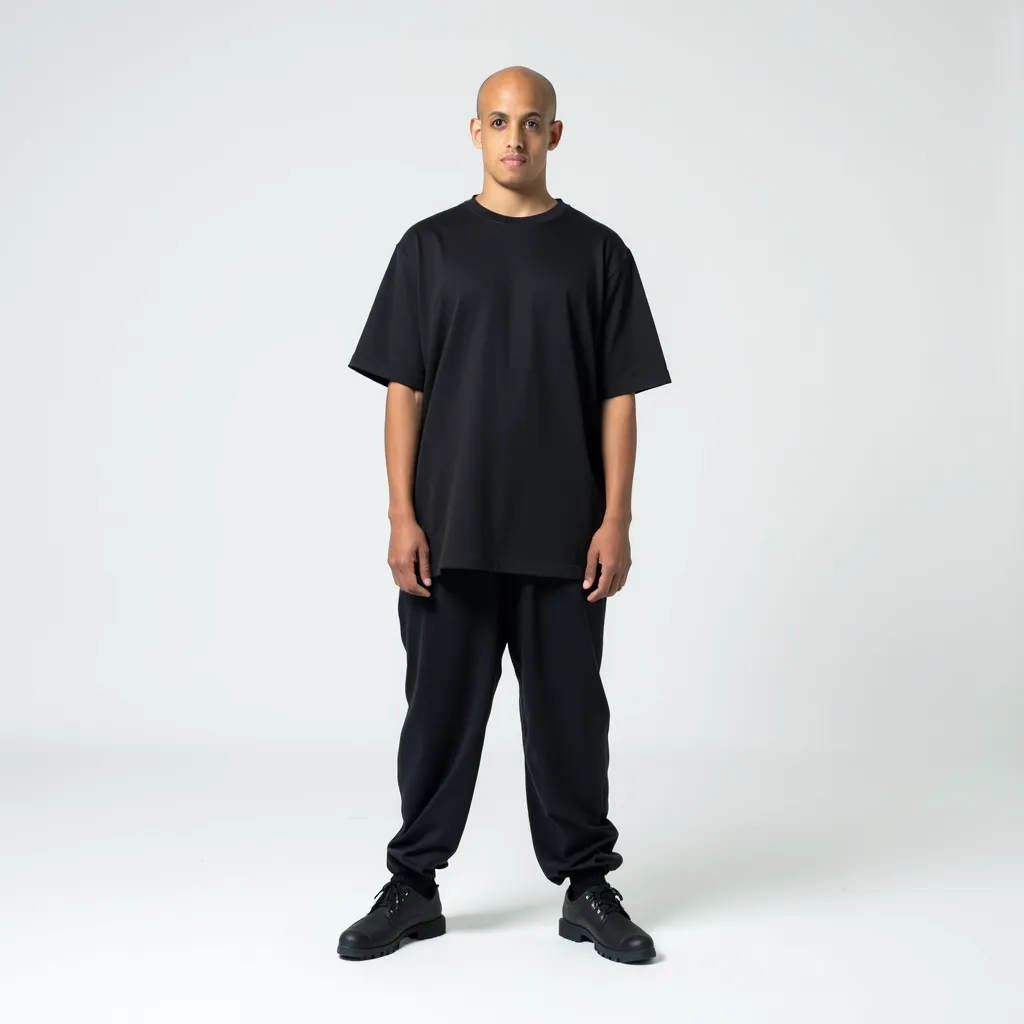
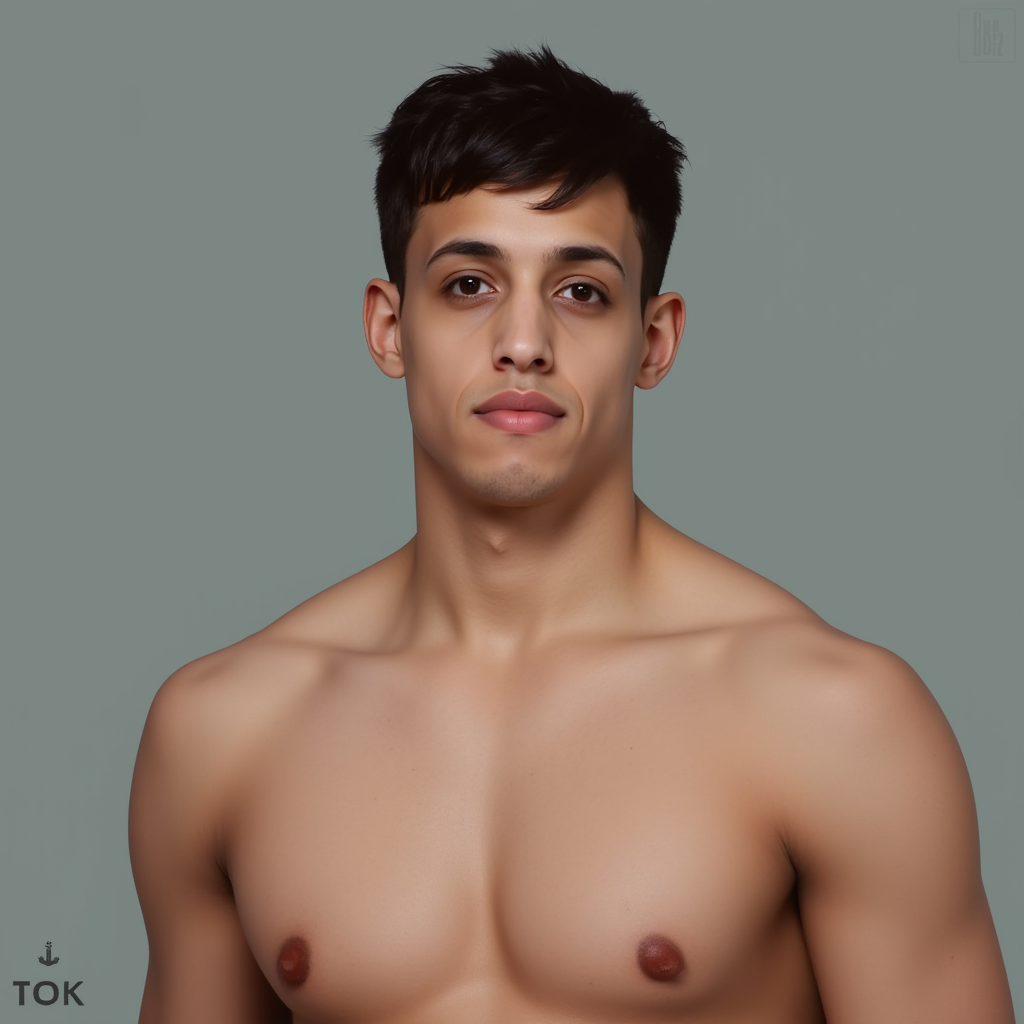
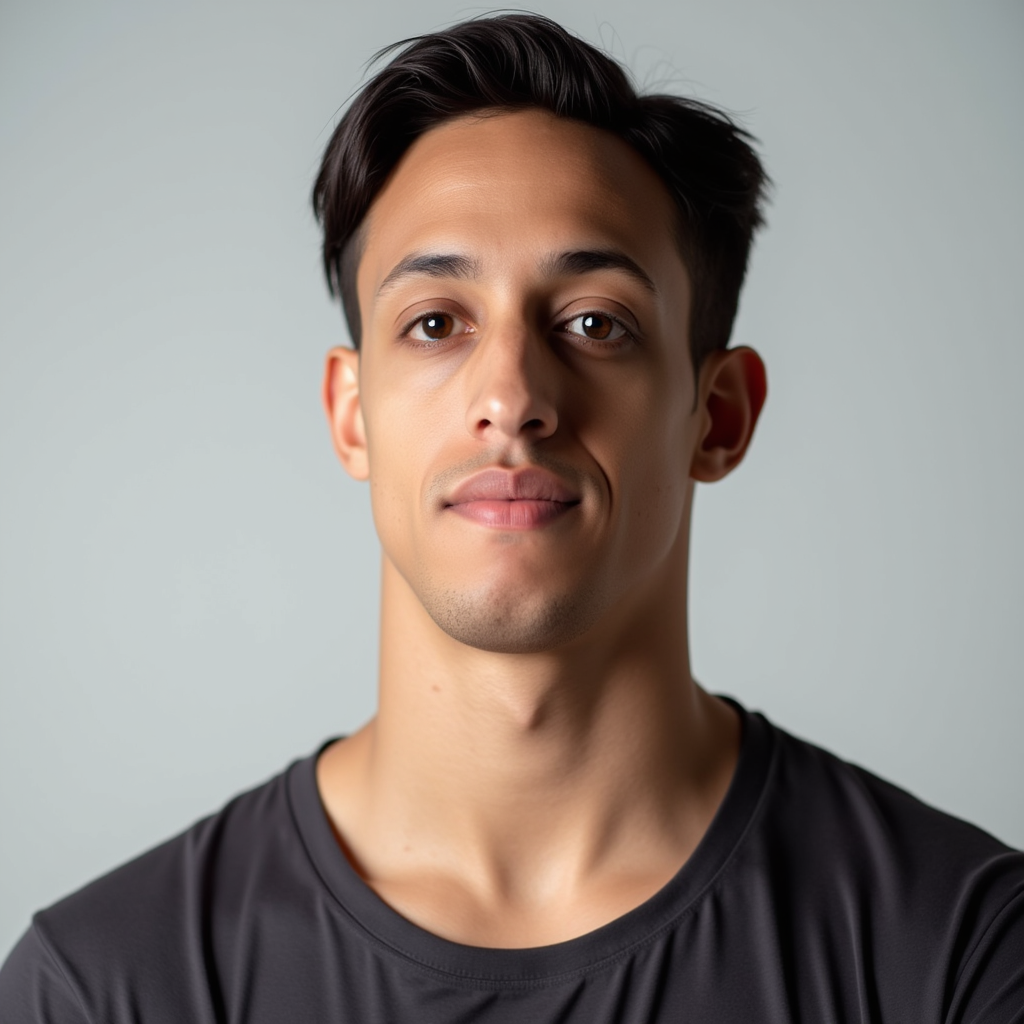
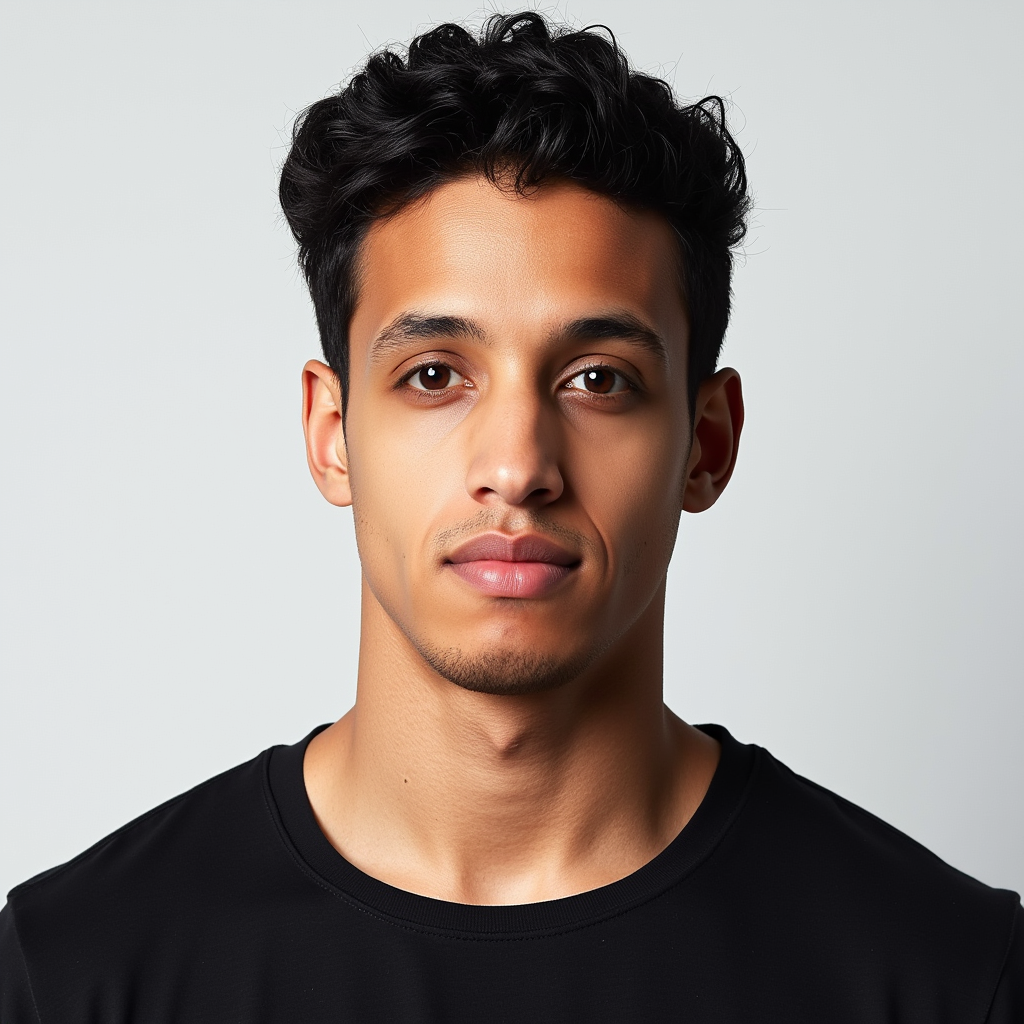
Prompt: TOK as a portrait, standing directly in the center of the image, looking at the camera, neutral expression, realistic, high detail, bust shot, plain background, soft lighting, masterpiece.
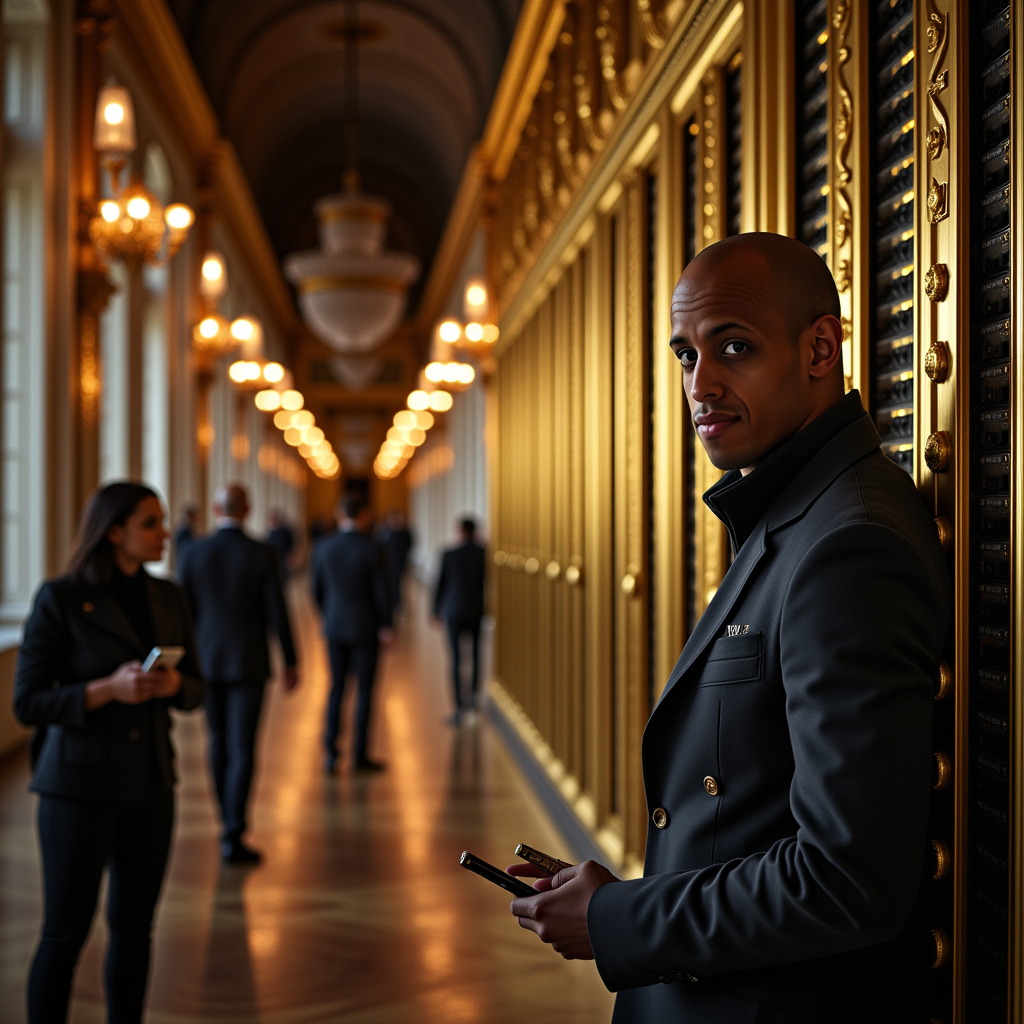
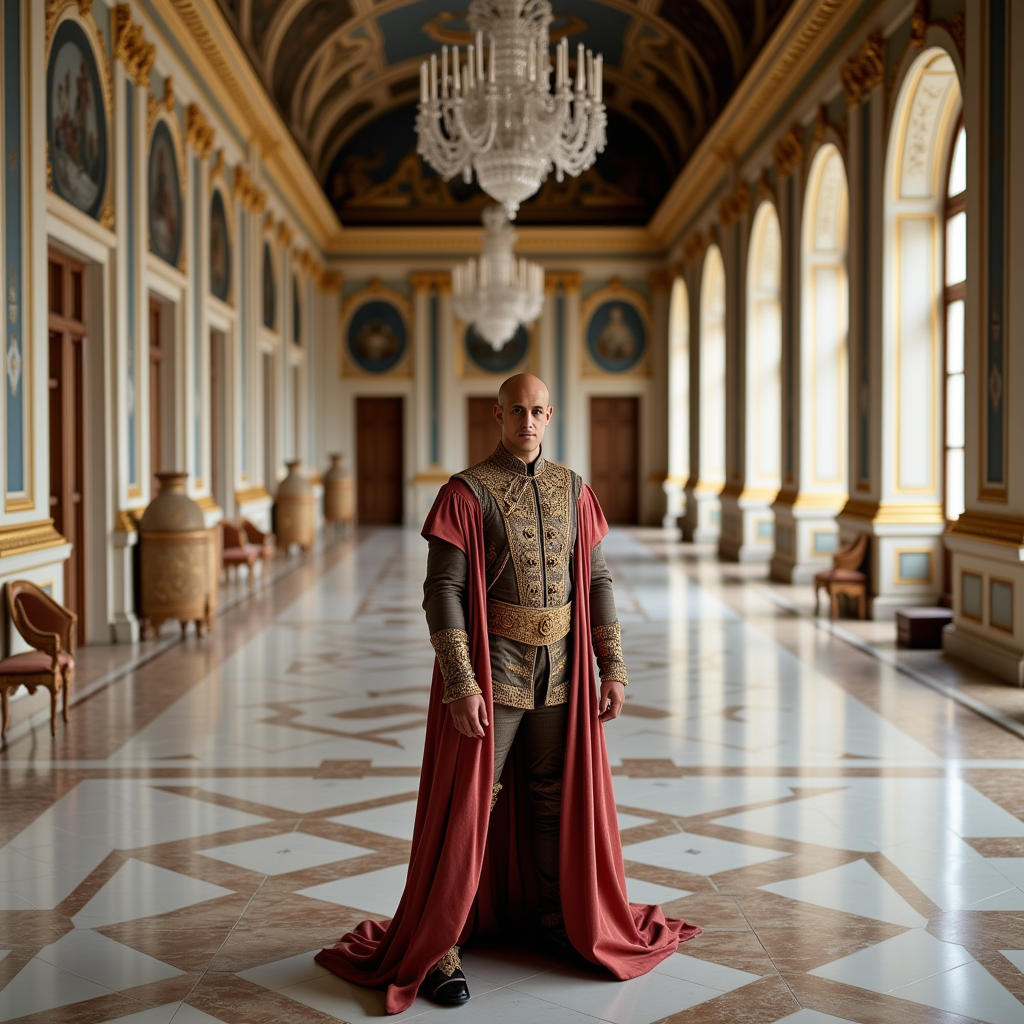
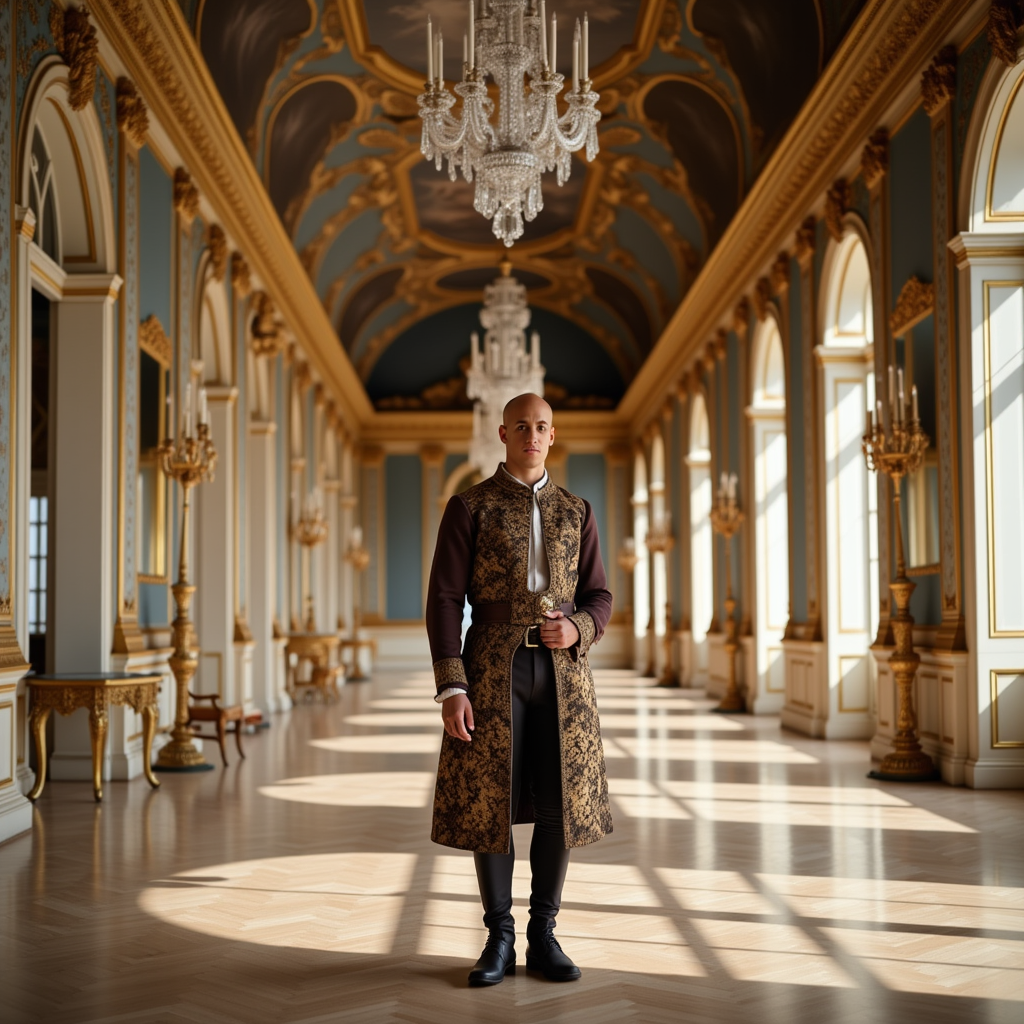
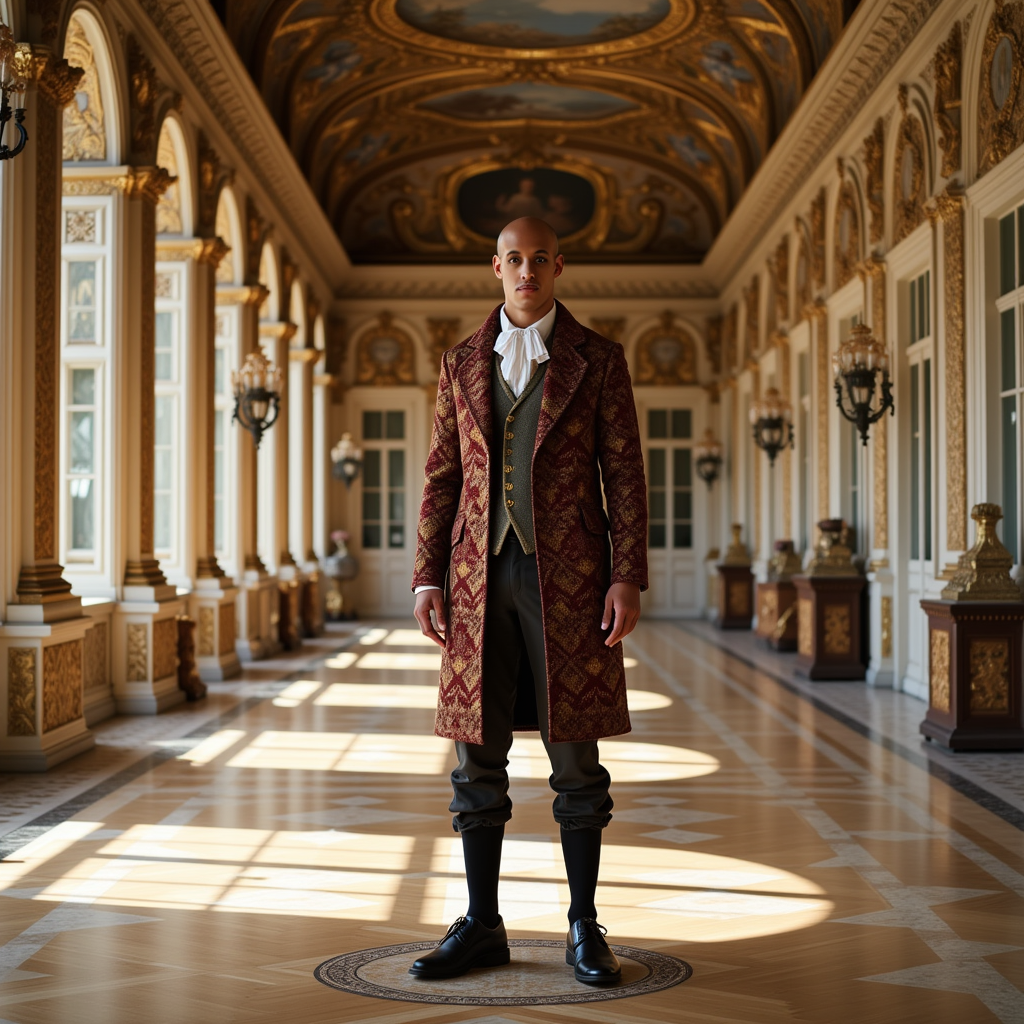
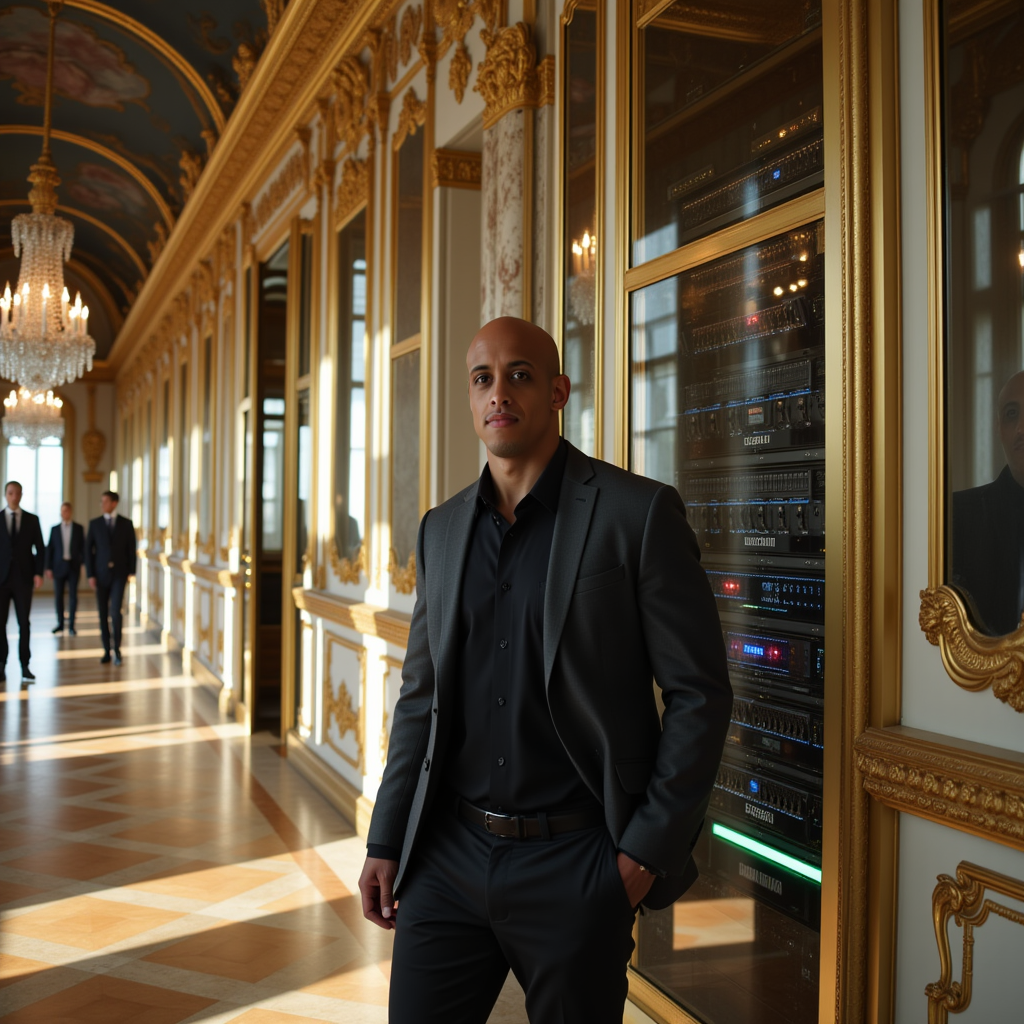
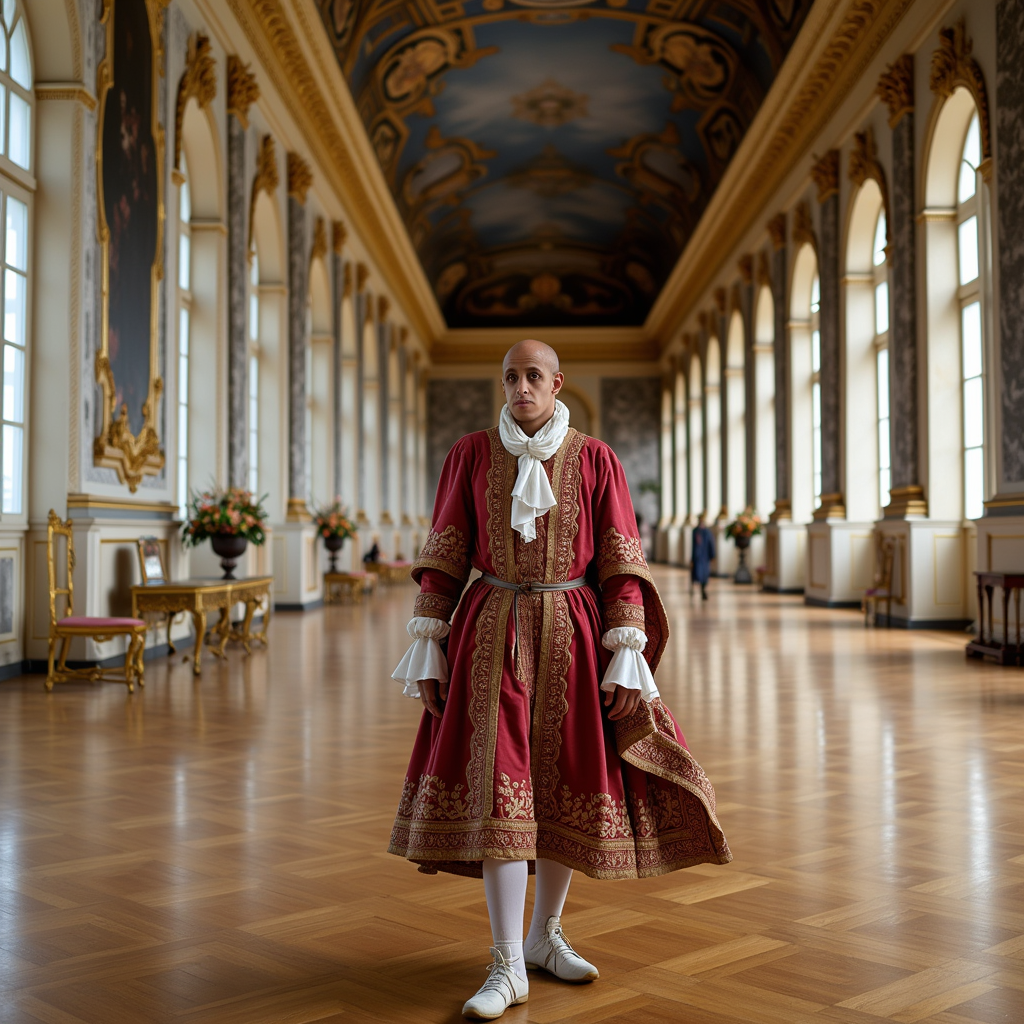
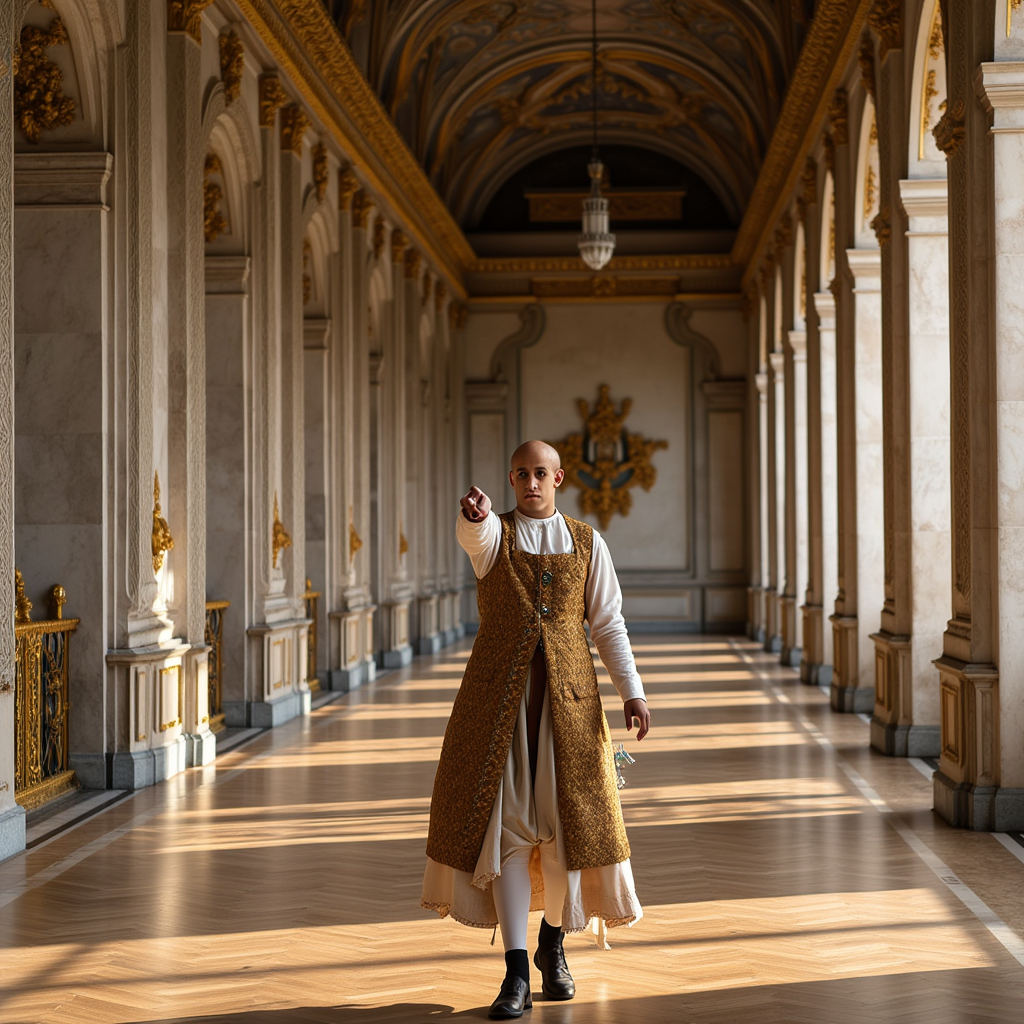
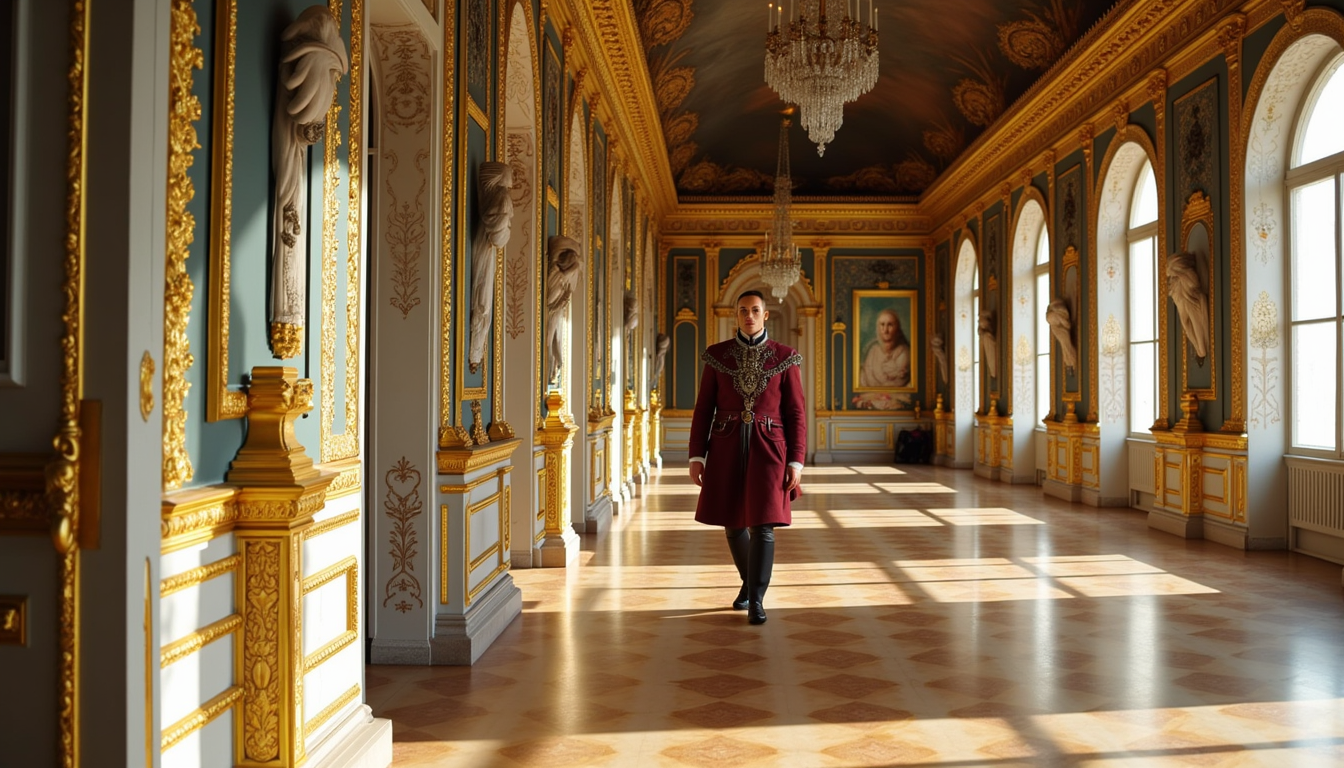
Prompt: TOK walking through the Palace of Versailles just after its completion, 17th century, ornate, cinematic, period clothing, marble halls, sunlight, wide angle, masterpiece, full body.
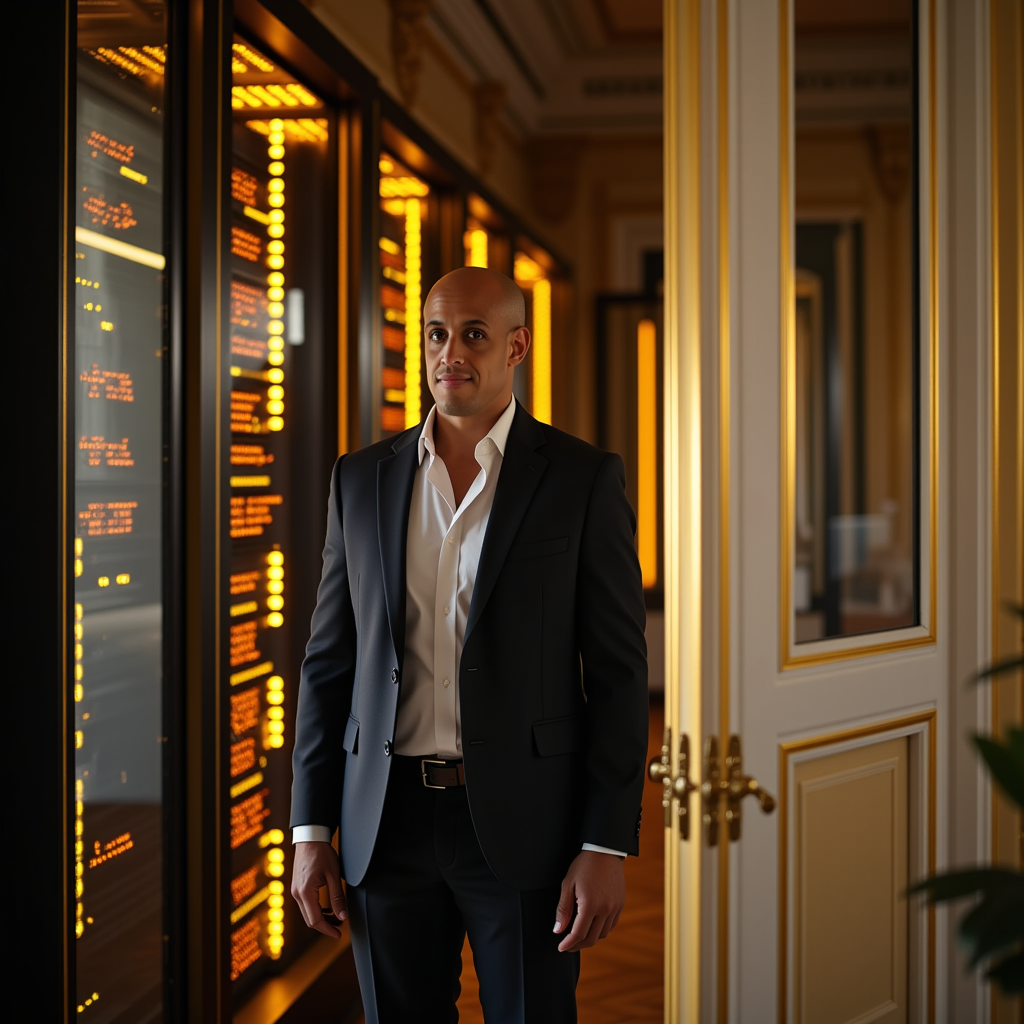
Cinematic Server Room Scene
Cinematic server room scene:
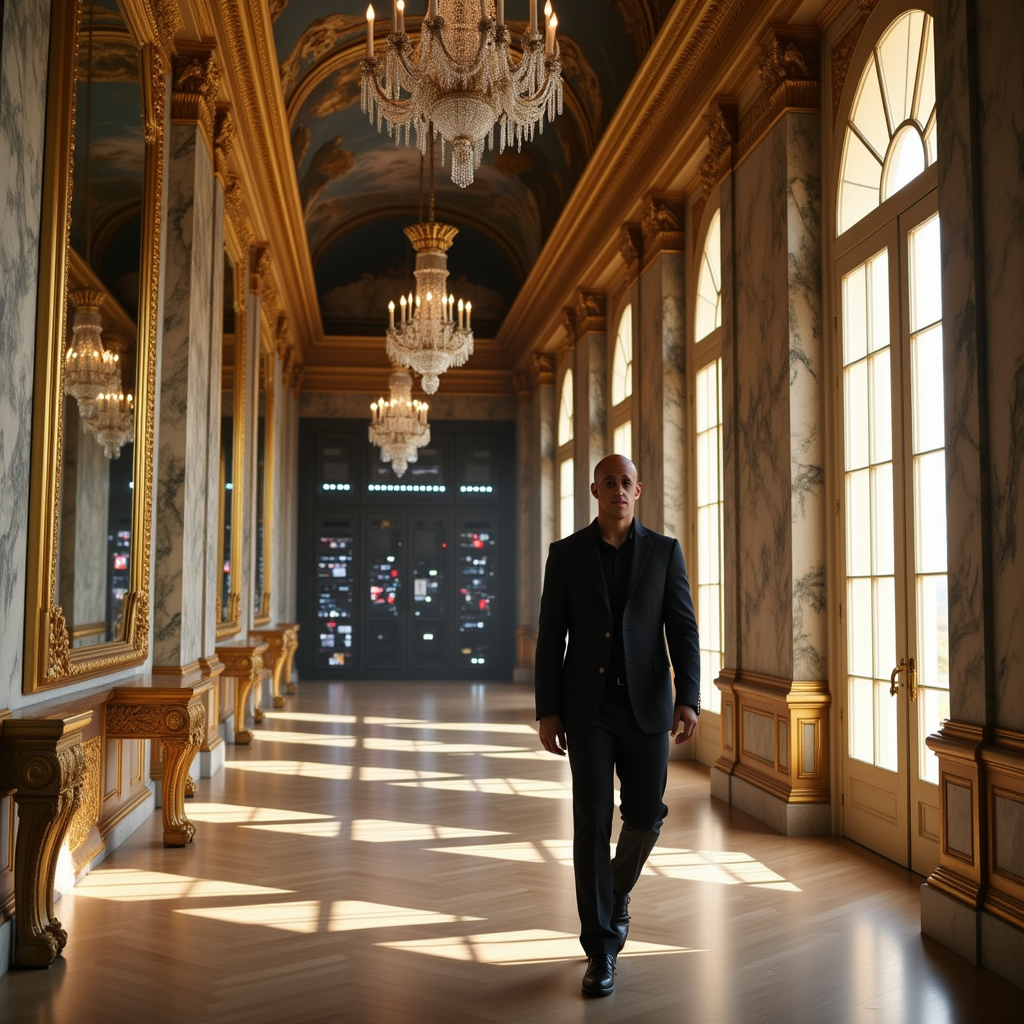
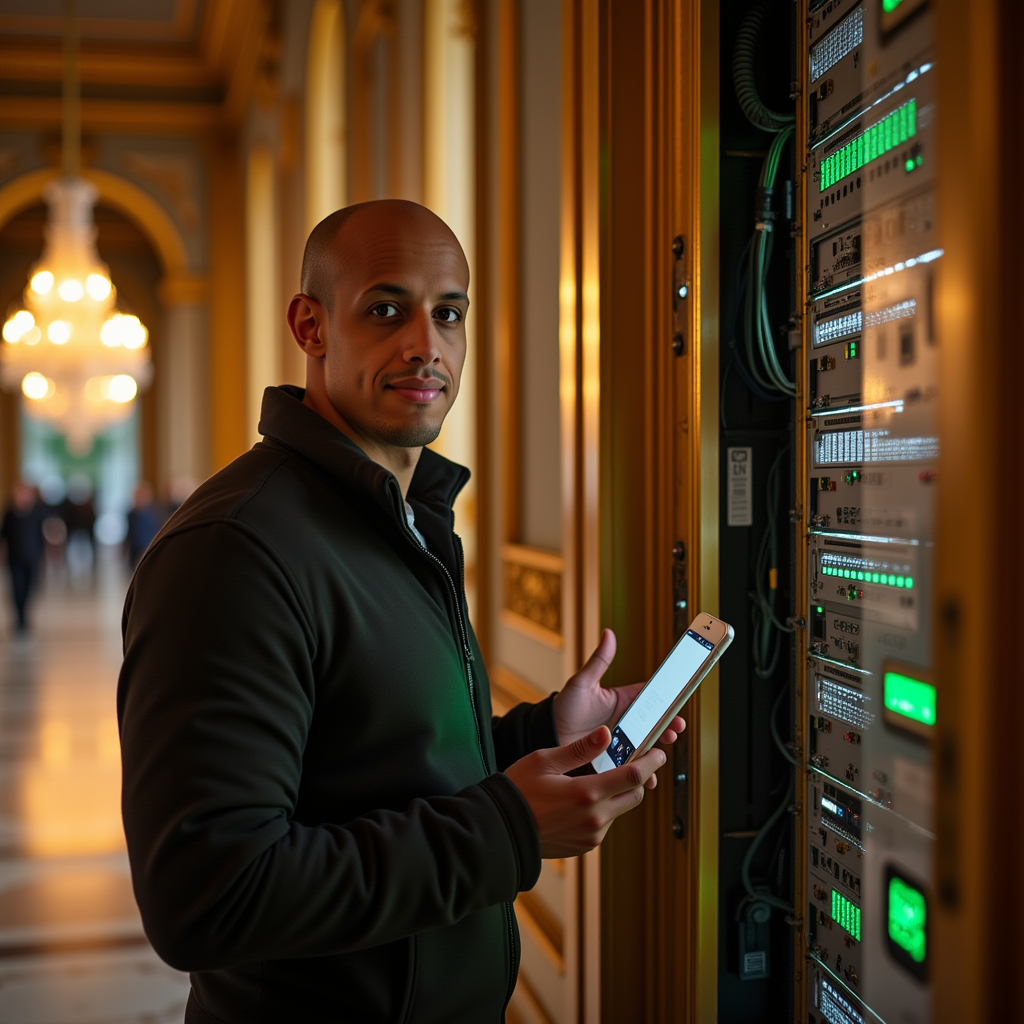
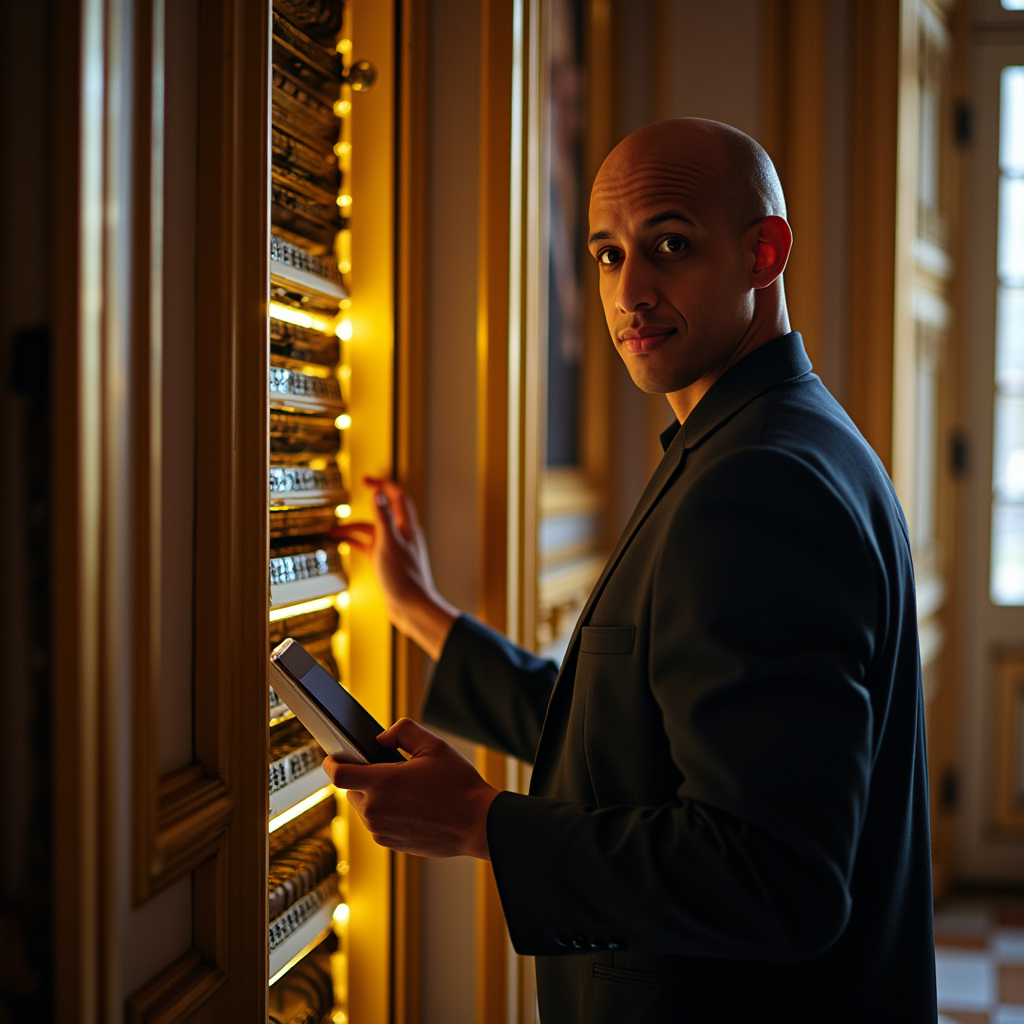
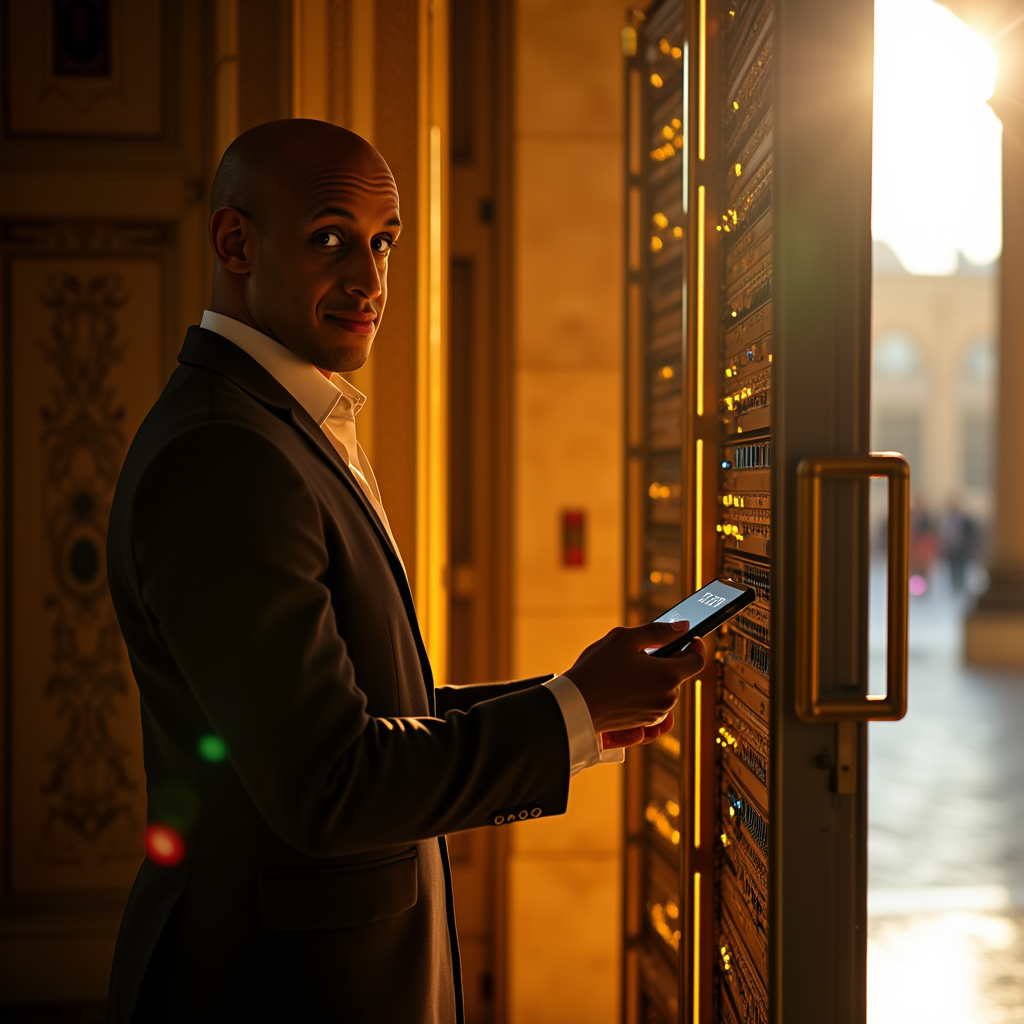
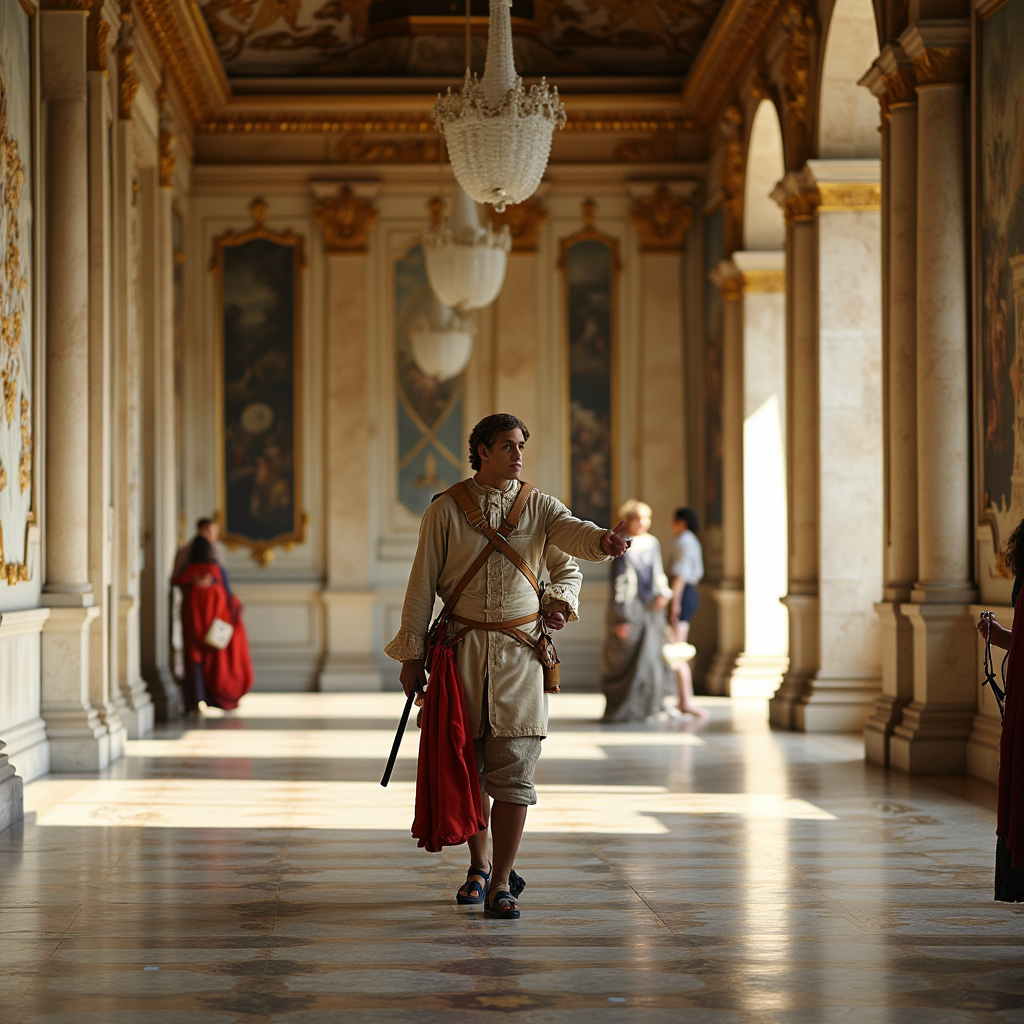
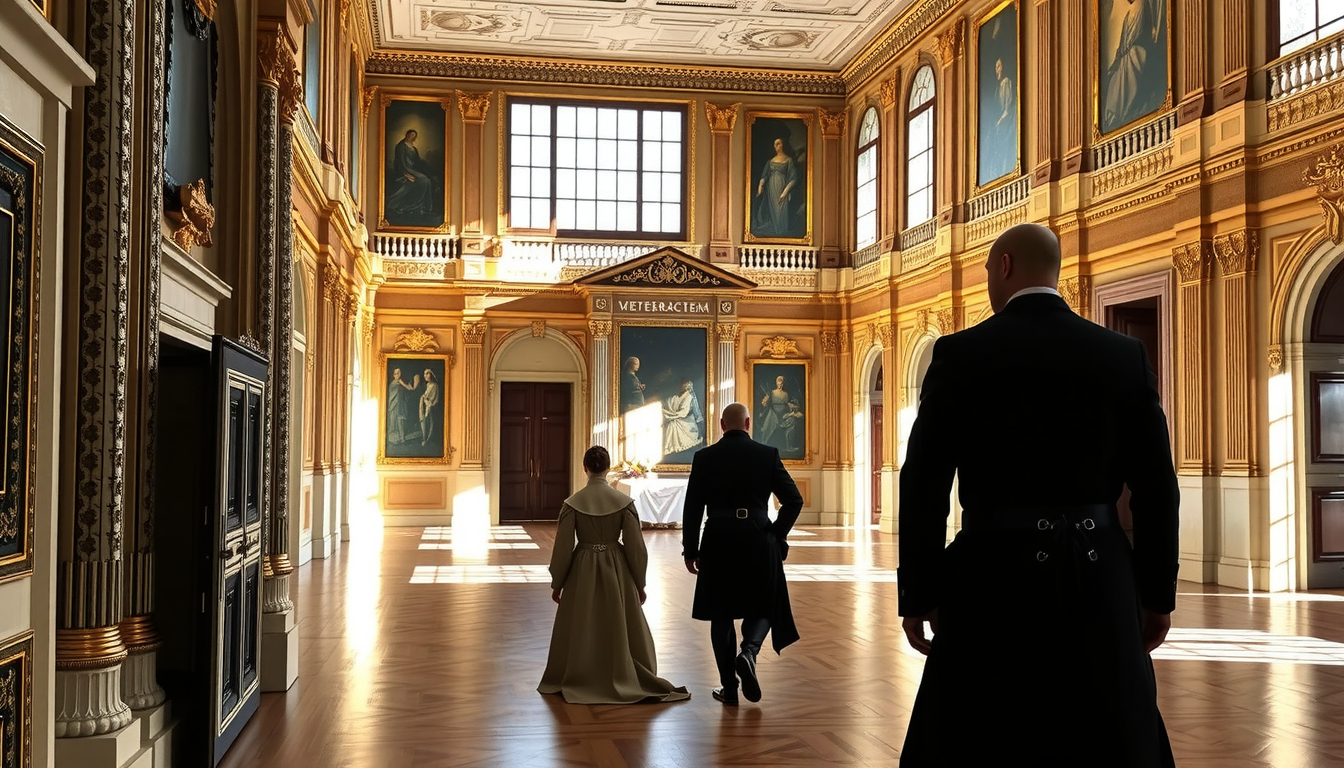
Prompt: A cinematic scene inside the Palace of Versailles, sunlight shining on gilded moldings and marble floors. TOK, wearing smart-casual modern clothes, walks confidently down an opulent hallway filled with golden mirrors and crystal chandeliers. TOK's face is clearly visible, looking toward the camera as it smoothly tracks their movement. TOK pauses beside a grand door and discreetly enters a hidden server room, concealed behind ornate paneling. Inside, glowing servers and monitors illuminate TOK's face amidst classical décor, blending the palace's luxury with cutting-edge technology. The atmosphere is suspenseful and mysterious.
Prompt: TOK, standing in the Palace of Versailles with a friendly, confident expression, illuminated by soft morning sunlight. TOK's face is fully visible, glancing toward the camera. TOK is inspecting a glowing server rack behind a gilded secret door, modern devices in hand. Subtle lens flare and cinematic shadows add atmosphere, blending high-tech and historical grandeur.
Now that we have scene-cast refinements from Step 10, it's time to train v3. The strategy: combine synthetic generation quality with scene diversity from refinements, grounded by real photos. This hybrid approach should give us the best of all worlds.
⚠️ Strategic Evolution: From Synthetic-Only to Hybrid
Original plan: Generate 25-100 purely synthetic images using v2 model, then train v3 entirely on those synthetics. The idea was to create "ideal" training data with perfect professional photography aesthetics.
The problem: When reviewing the synthetic outputs, I noticed something critical - they lost the "soul" of the original images. The synthetics look lifeless, almost like I got botox. Too polished, too perfect, too much like every other AI-generated image out there.
The realization: My own likeness needs to be embedded in the training data, not replaced by synthetic perfection. Real photos capture something synthetic generation can't - authenticity, natural expression, genuine presence. Whatever "soul" means in an image, it's there in the originals and missing in the synthetics.
Revised strategy: Hybrid approach with 75 synthetic + 75 scene-cast refined + 84 original photos. This balances professional quality and scene diversity with authentic likeness. The goal is to enhance my actual identity, not replace it with a polished but soulless AI version.
Hybrid Training Dataset Composition (234 total images):
84
Original Real Photos (Foundation - 36%)
Curated real photos from v2 training. These are the soul of the dataset - capturing genuine expressions, natural presence, and authentic identity that synthetic images can't replicate. Ground truth for my actual likeness.
75
Synthetic Generated Images (Quality Layer - 32%)
Base v2 outputs from Step 9 - diverse poses, lighting, and scenarios across 25 influencer-style prompts. Professional photography aesthetics and scenario variety, but carefully balanced to avoid the "lifeless AI" look.
75
Scene-Cast Refined Images (Diversity Layer - 32%)
Nano Banana refinements from Step 10 - same characters cast into completely different scenes (European streets, mountain lakes, Japanese gardens, rooftop terraces, etc.). Maximum environmental diversity while preserving identity.
Why this 3-way hybrid approach works:
•
Original photos (84 - 36%) anchor everything to reality. They preserve the "soul" - genuine expressions, natural presence, and authentic identity that prevent the model from learning the lifeless "AI botox" aesthetic.
•
Synthetic images (75 - 32%) provide professional photography quality and scenario diversity. They show the model what "ideal" outputs look like, but are balanced with real photos to avoid over-polished artificial results.
•
Scene-cast refinements (75 - 32%) add massive environmental diversity. Same character across 25+ completely different settings (European streets, mountain lakes, Japanese gardens). Teaches identity consistency across wildly varied contexts.
•
Balanced 36/32/32 ratio ensures no single source dominates. The original photos provide the authentic foundation, while synthetic and refined images add controlled diversity without overwhelming that authenticity.
•
Preserves authenticity - With 64% of the dataset being real or real-based (originals + refinements built on synthetics that started from v2), the model stays grounded in my actual likeness rather than drifting toward generic AI aesthetics.
Expected improvements in v3:
✓Better identity consistency across diverse prompts (scene-cast training data)
✓More professional photography quality without losing realism (synthetic + refined examples)
✓Stronger scene understanding - model trained on 25+ different environments
✓Maintained authenticity grounded by real photos
✓Reduced synthetic artifacts through balanced training data mix
The Step 9 results look decent, but they're still base v2 outputs. Before using them for v3 training, I want to refine them with Nano Banana (Google's Gemini 2.5 Flash Image). The goal: upscale quality while preserving identity exactly as generated.
Key Learnings from Testing:
•Scene casting > scene enhancement - Cast characters to new environments for diverse training data, not just upscaling the same scene
•Start with "Same person now..." - This signals identity preservation while transitioning to a completely different scene
•Describe the complete new environment - Include all scene details: setting, lighting, atmosphere, textures, background elements
•Explicitly state "no lens flare" - Otherwise Nano Banana may add artificial glare that degrades facial features
•Upload local files, don't use URLs - Replicate CDN URLs may expire or return errors; local upload is more reliable
•Mix and match later - Scene casting lets you create multiple dataset variations from one generation pass
Why Nano Banana?
Nano Banana is designed for "subject identity preservation" - it can enhance image quality while maintaining the exact character, facial structure, and composition. Perfect for taking synthetic training data and making it look like professional photography without changing who's in the photo.
This is different from normal upscaling. We're not just adding pixels - we're using a multimodal model that understands the image content and can enhance it intelligently while respecting identity constraints.
Technical validation:
•Format support: Accepts WebP/PNG/JPEG/HEIC/HEIF as input, outputs PNG/JPG only
•Local file upload: Upload local files directly instead of using URLs (more reliable than passing Replicate CDN links)
•Identity preservation: Built-in character consistency across transformations
•Aspect ratio matching: Preserves original composition with match_input_image
•Processing time: ~10-15s GPU time per image, plus upload/download overhead (~20-40s total per image)
The prompt strategy (scene casting for diverse datasets):
The key insight: Don't enhance the same scene - cast the character into a completely different scene. This creates diverse training data with consistent identity across varied scenarios.
Think of it like identity-preserving teleportation: Take the character from the generated image (e.g., "white studio") and place them in an entirely new environment (e.g., "European cobblestone street at sunset", "mountain lake at dawn", "Japanese garden", "urban rooftop at blue hour").
By casting to different scenes, you maintain perfect identity consistency while drastically increasing dataset diversity. This allows you to later mix datasets or create varied training scenarios all from a single generation pass.
Notice: No TOK trigger word. That's for the LoRA model during generation. For refinement, describe the new scene where you're casting the character.
Example refinement prompts (scene casting approach):
✗ Bad (same scene enhancement):
Original: "Person in white studio minimalist setting"
"Enhance to professional studio photography with better lighting and sharpness"
← Same scene, minimal diversity - defeats the purpose
✓ Good (scene casting - completely new environment):
Original: "Person in white studio minimalist setting"
"Same person now standing on sun-drenched cobblestone street in charming European old town, golden afternoon sunlight, wearing same modern streetwear, ancient stone buildings with weathered texture in background, warm terracotta and cream colored walls, window boxes with colorful flowers, natural shadows from buildings creating dramatic lighting, authentic street photography aesthetic, visible cobblestone texture under feet, 35mm documentary style, natural color grading, no lens flare"
← Same character, entirely different scene = diverse training data!
✓ Good (another scene cast example):
Original: "Person at outdoor café with laptop"
"Same person now seated on weathered wooden dock at serene mountain lake, early morning mist rising from water surface, wearing same smart casual outfit, laptop and coffee cup on dock beside them, pine forest reflected in still water, dramatic mountain peaks visible in distance, peaceful dawn lighting with soft pink and blue sky, natural wood dock texture, wilderness digital nomad aesthetic, mirror-like water reflections, tranquil nature setting, no lens flare"
← Café scene → Mountain lake scene with same character identity
✓ Good (scene casting preserves outfit, changes everything else):
Original: "Person in modern gym with athletic wear"
"Same person now on sandy beach at golden hour sunset, ocean waves gently rolling in background, wearing same athletic wear with towel over shoulder, wet sand with footprints visible, warm orange and pink sunset sky reflected on water, seabirds in distance, beachside fitness lifestyle aesthetic, natural sunset rim lighting creating glow, authentic beach workout moment, warm coastal color palette, visible sand texture, ocean horizon line, no artificial lighting"
← Gym → Beach sunset while keeping identity and outfit constant
Before committing to generating 100 images (and spending ~$2), I ran a small test batch first: 6 prompts × 2 genders × 1 variation = 12 images. This lets me validate the approach, check for consistency issues, and see if the prompt structure actually works before scaling up.
Why test first?
With synthetic training data, you can iterate forever. But iteration costs money and time. A 12-image test batch (~$0.24, ~6 minutes) tells me if the prompts generate what I expect, if the model maintains likeness across different scenarios, and whether the gender conversion approach produces usable results. If this test looks good, I scale to 100. If not, I adjust the prompts and test again.
Here's what came out of genego-io/edwin-avatar-v2 with this first test run:
→Consistency is decent but not perfect - some variations maintain likeness better than others
→Gender conversion worked - female versions look natural, not just face-swapped
→Composition follows prompts well - full body shots actually show full body, not cropped
→Some images are clearly stronger candidates for refinement than others
Next steps:
Review which images maintain likeness best across both genders
Mark top performers in metadata (selected_for_refinement: true)
Generate full 100-image dataset with refined prompt strategy if needed
Run Nano Banana refinement on selected images
Train v3 with curated refined dataset
Decision point:
Do these results justify generating 88 more images (to reach 100 total), or should I refine the prompt strategy first? The metadata tracking from Step 8 gives me full traceability either way - I can trace any training image back to its exact generation parameters and make data-driven adjustments.
Step 8Generating the Training ImagesPython + Replicate API
Now that we have 25 diverse prompts, it's time to generate the actual training images. But this isn't just about running the prompts - I need to track which reference images map to which generated outputs so I can intelligently select them for Nano Banana refinement later.
Step 7Generating Training Data Prompts25 influencer-style scenarios
To generate the 100 synthetic images for v3 training, I need diverse prompts that cover different scenarios influencers actually shoot. Here are 25 prompt templates designed to create varied, professional-looking training data.
Flux-optimized prompt structure:
•Identity anchor: "TOK" trigger word with consistent subject positioning
Pass best outputs through Nano Banana for refinement
Curate final 100 images for v3 training dataset
Step 6Planning v3 trainingSynthetic data + upscaling
I actually like what I'm seeing here. It's my likeness, not uncanny valley. But here's the thing: I trained genego-io/edwin-avatar-v2 on 84 random pictures from my iPhone camera roll. It's doing its job, but I think I can do better.
🔒 Want the full v3 training strategy and cost breakdown?
Testing two different video generation models to see which works better.
VEO3
Looks alright, but not that good, or even impressive. We're getting somewhere though.
bytedance/seedance-1-pro
Much much better, but kind of wonky.
bytedance/seedance-1-pro→ Second attempt
Okay much much better, an improvement. We would need to control the consistency of the character much better though.
Initial thoughts:
ByteDance clearly wins on quality, but neither is perfect yet. The avatar moves, the scenes render, and the system works end-to-end. This is the baseline - now I know what needs to improve.
Step 4Experimenting with other promptsVersailles server room scenario
Testing different scenarios and prompts to see what the model can do.
Cinematic scene in Versailles:
Prompt: A cinematic scene inside the Palace of Versailles, sunlight shining on gilded moldings and marble floors. TOK, wearing smart-casual modern clothes, walks confidently down an opulent hallway filled with golden mirrors and crystal chandeliers. TOK's face is clearly visible, looking toward the camera as it smoothly tracks their movement. TOK pauses beside a grand door and discreetly enters a hidden server room, concealed behind ornate paneling. Inside, glowing servers and monitors illuminate TOK's face amidst classical décor, blending the palace's luxury with cutting-edge technology. The atmosphere is suspenseful and mysterious.
Inspecting the server room:
Prompt: TOK, standing in the Palace of Versailles with a friendly, confident expression, illuminated by soft morning sunlight. TOK's face is fully visible, glancing toward the camera. TOK is inspecting a glowing server rack behind a gilded secret door, modern devices in hand. Subtle lens flare and cinematic shadows add atmosphere, blending high-tech and historical grandeur.
Step 3Fine-tuning with fast-flux-trainerfast-flux-trainer
I fine-tuned replicate/fast-flux-trainer with 8x H100s. The results are much better.
Example outputs (fast-flux-trainer):
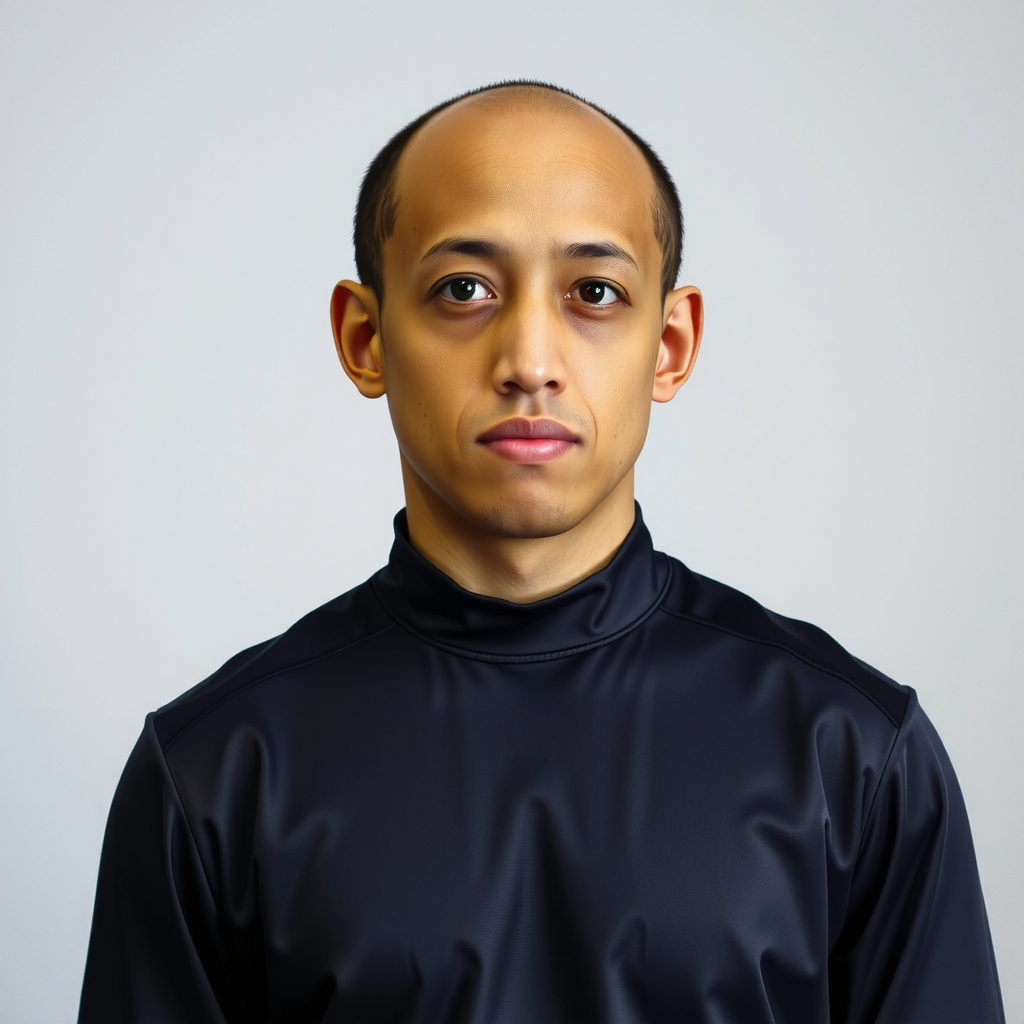
Prompt: TOK as a portrait, standing directly in the center of the image, looking at the camera, neutral expression, realistic, high detail, bust shot, plain background, soft lighting, masterpiece.
Prompt: TOK walking through the Palace of Versailles just after its completion, 17th century, ornate, cinematic, period clothing, marble halls, sunlight, wide angle, masterpiece, full body.
Step 2Realizing, that the model ended up crap
Training finished. I generated test outputs. And here's the problem: even with 84 images, it doesn't really look like me. I mean, there is some distant resemblance, but I don't really look like "me". And I don't look like I would want an influencer to look like (for now). Let's go with a different approach here.
Example outputs:
Prompt: TOK as a portrait, standing directly in the center of the image, looking at the camera, neutral expression, realistic, high detail, bust shot, plain background, soft lighting, masterpiece.
Prompt: TOK walking through the Palace of Versailles just after its completion, 17th century, ornate, cinematic, period clothing, marble halls, sunlight, wide angle, masterpiece, full body.
What I'm doing now:
Currently debating with an LLM on what model to use next. The Flux LoRA trainer did its job - it learned something - but the likeness isn't there. I need a different approach, maybe a different model architecture, maybe more training data, maybe a different preprocessing pipeline. Figuring that out now.
Step 1Training a modelostris/flux-dev-lora-trainer
This morning I kicked off a training run: ostris/flux-dev-lora-trainer on Replicate, 1,000 steps, 84 images of myself. Now I wait and see if it works.